Controlling DSLR using Android App, Raspberry Pi and gphoto2
Updated this blog post in March 2025 to make it more readable and include additional examples! Site best viewed on desktop.
Introduction
Hello dear reader! In this post I will be discussing how to control a DSLR camera using an Android app, Raspberry Pi, gphoto2 and some code. I found this capability very useful for my endeavours and hope that you may as well for yours. I will go over motivations, how to setup, linked code and an example use case.
Here is a view of the deployed system below (with the Android phone, in my hand, taking the picture):

Quick notes:
-
gphoto2 is a free application that can be used to control a variety of different cameras via commandline.
-
The Raspberry Pi can be replaced with another computer. Raspberry Pi is chosen as it is leightweight and cheap.
-
Android app is useful because it allows for wireless, remote control and a nice user interface. It communicates with the Raspberry Pi. However, the Android app is not strictly necessary as you can just use the Raspberry Pi to communicate with the camera via gphoto2 directly. If using the Android app, then the Raspberry Pi acts as a middleman between the phone and camera.
Here is a video of my personal project where I used the code and concepts discussed in this blog post to use AI to capture pictures of train graffiti:
Here are reasons why you may find the setup useful:
Contents |
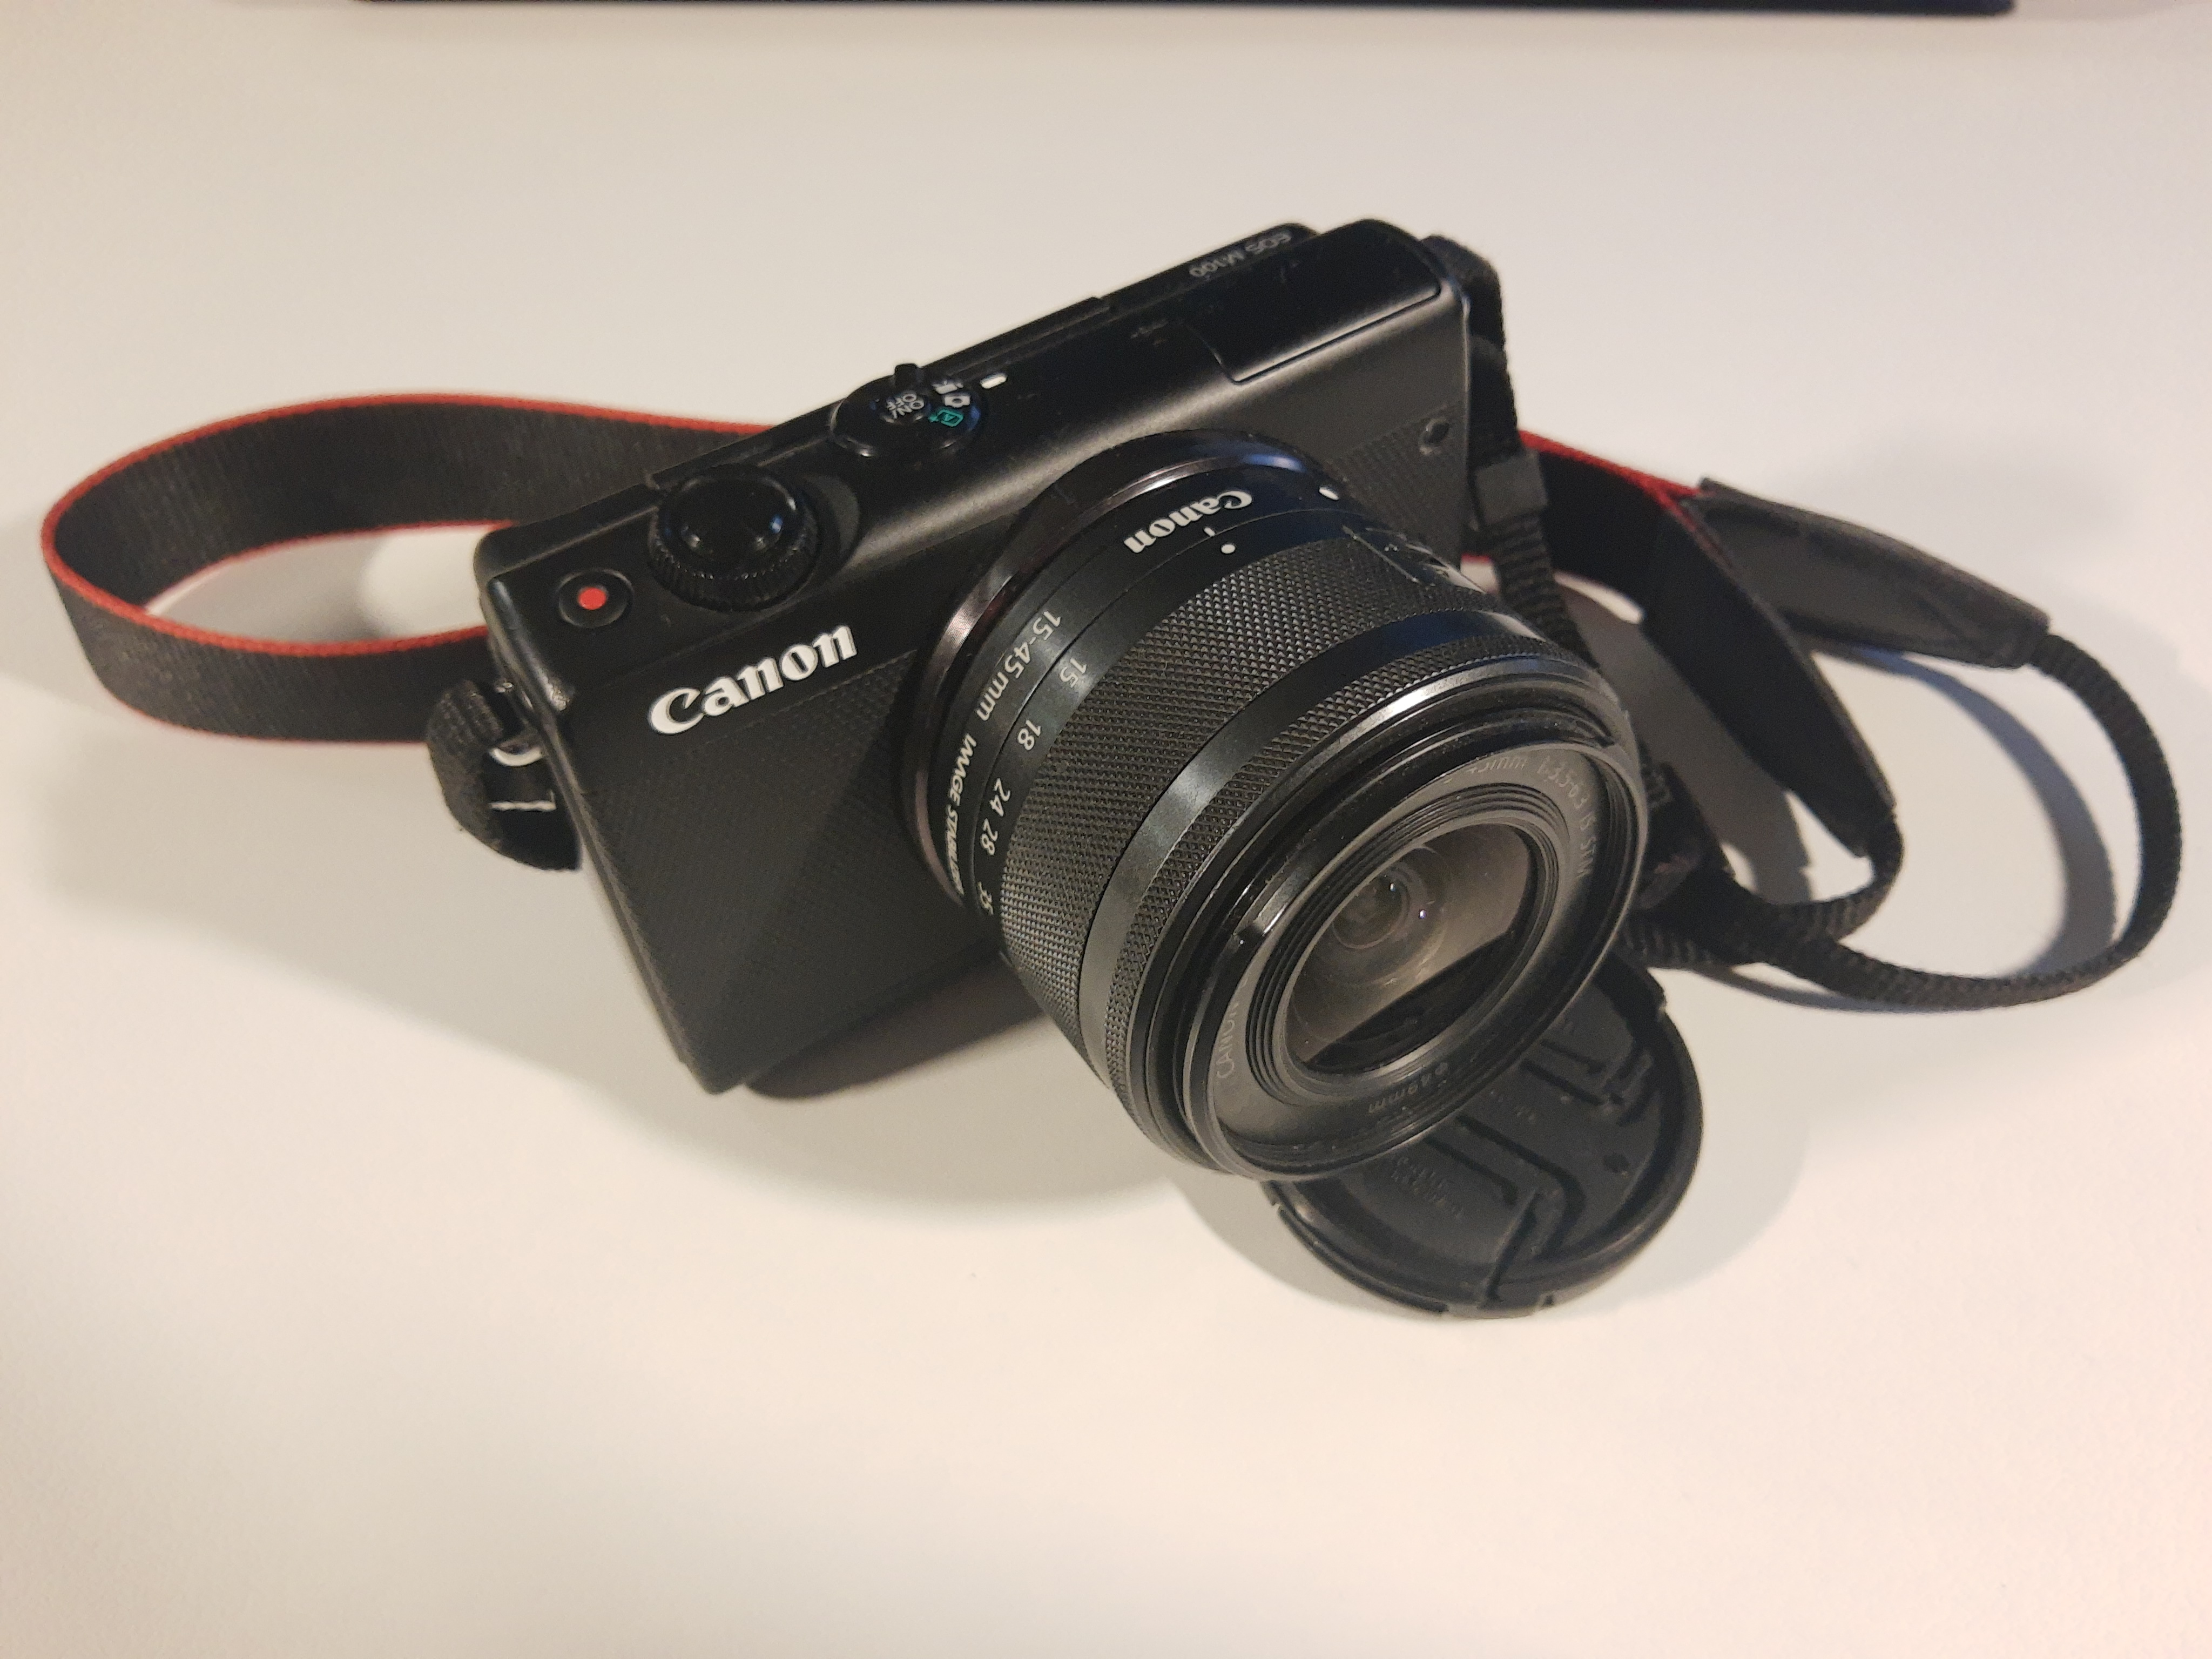
Cameras come with limitationsIn this blog I will be using the Canon M100.
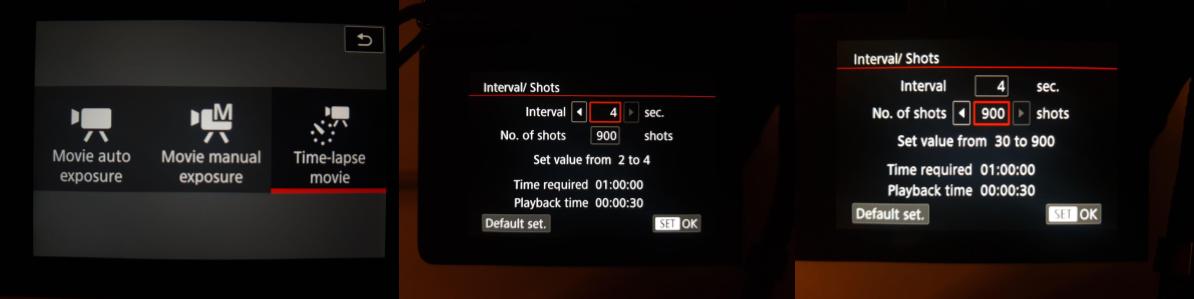
In the case of the M100, the camera has a limitation on how long you can take time-lapse photos for. In the image below, three screenshots from the M100 configuration screen show that you can set to take photos every 2 to 4 seconds and up to 900 shots. Combining the two upper limits you can only takes a time-lapse spanning an hour in time.
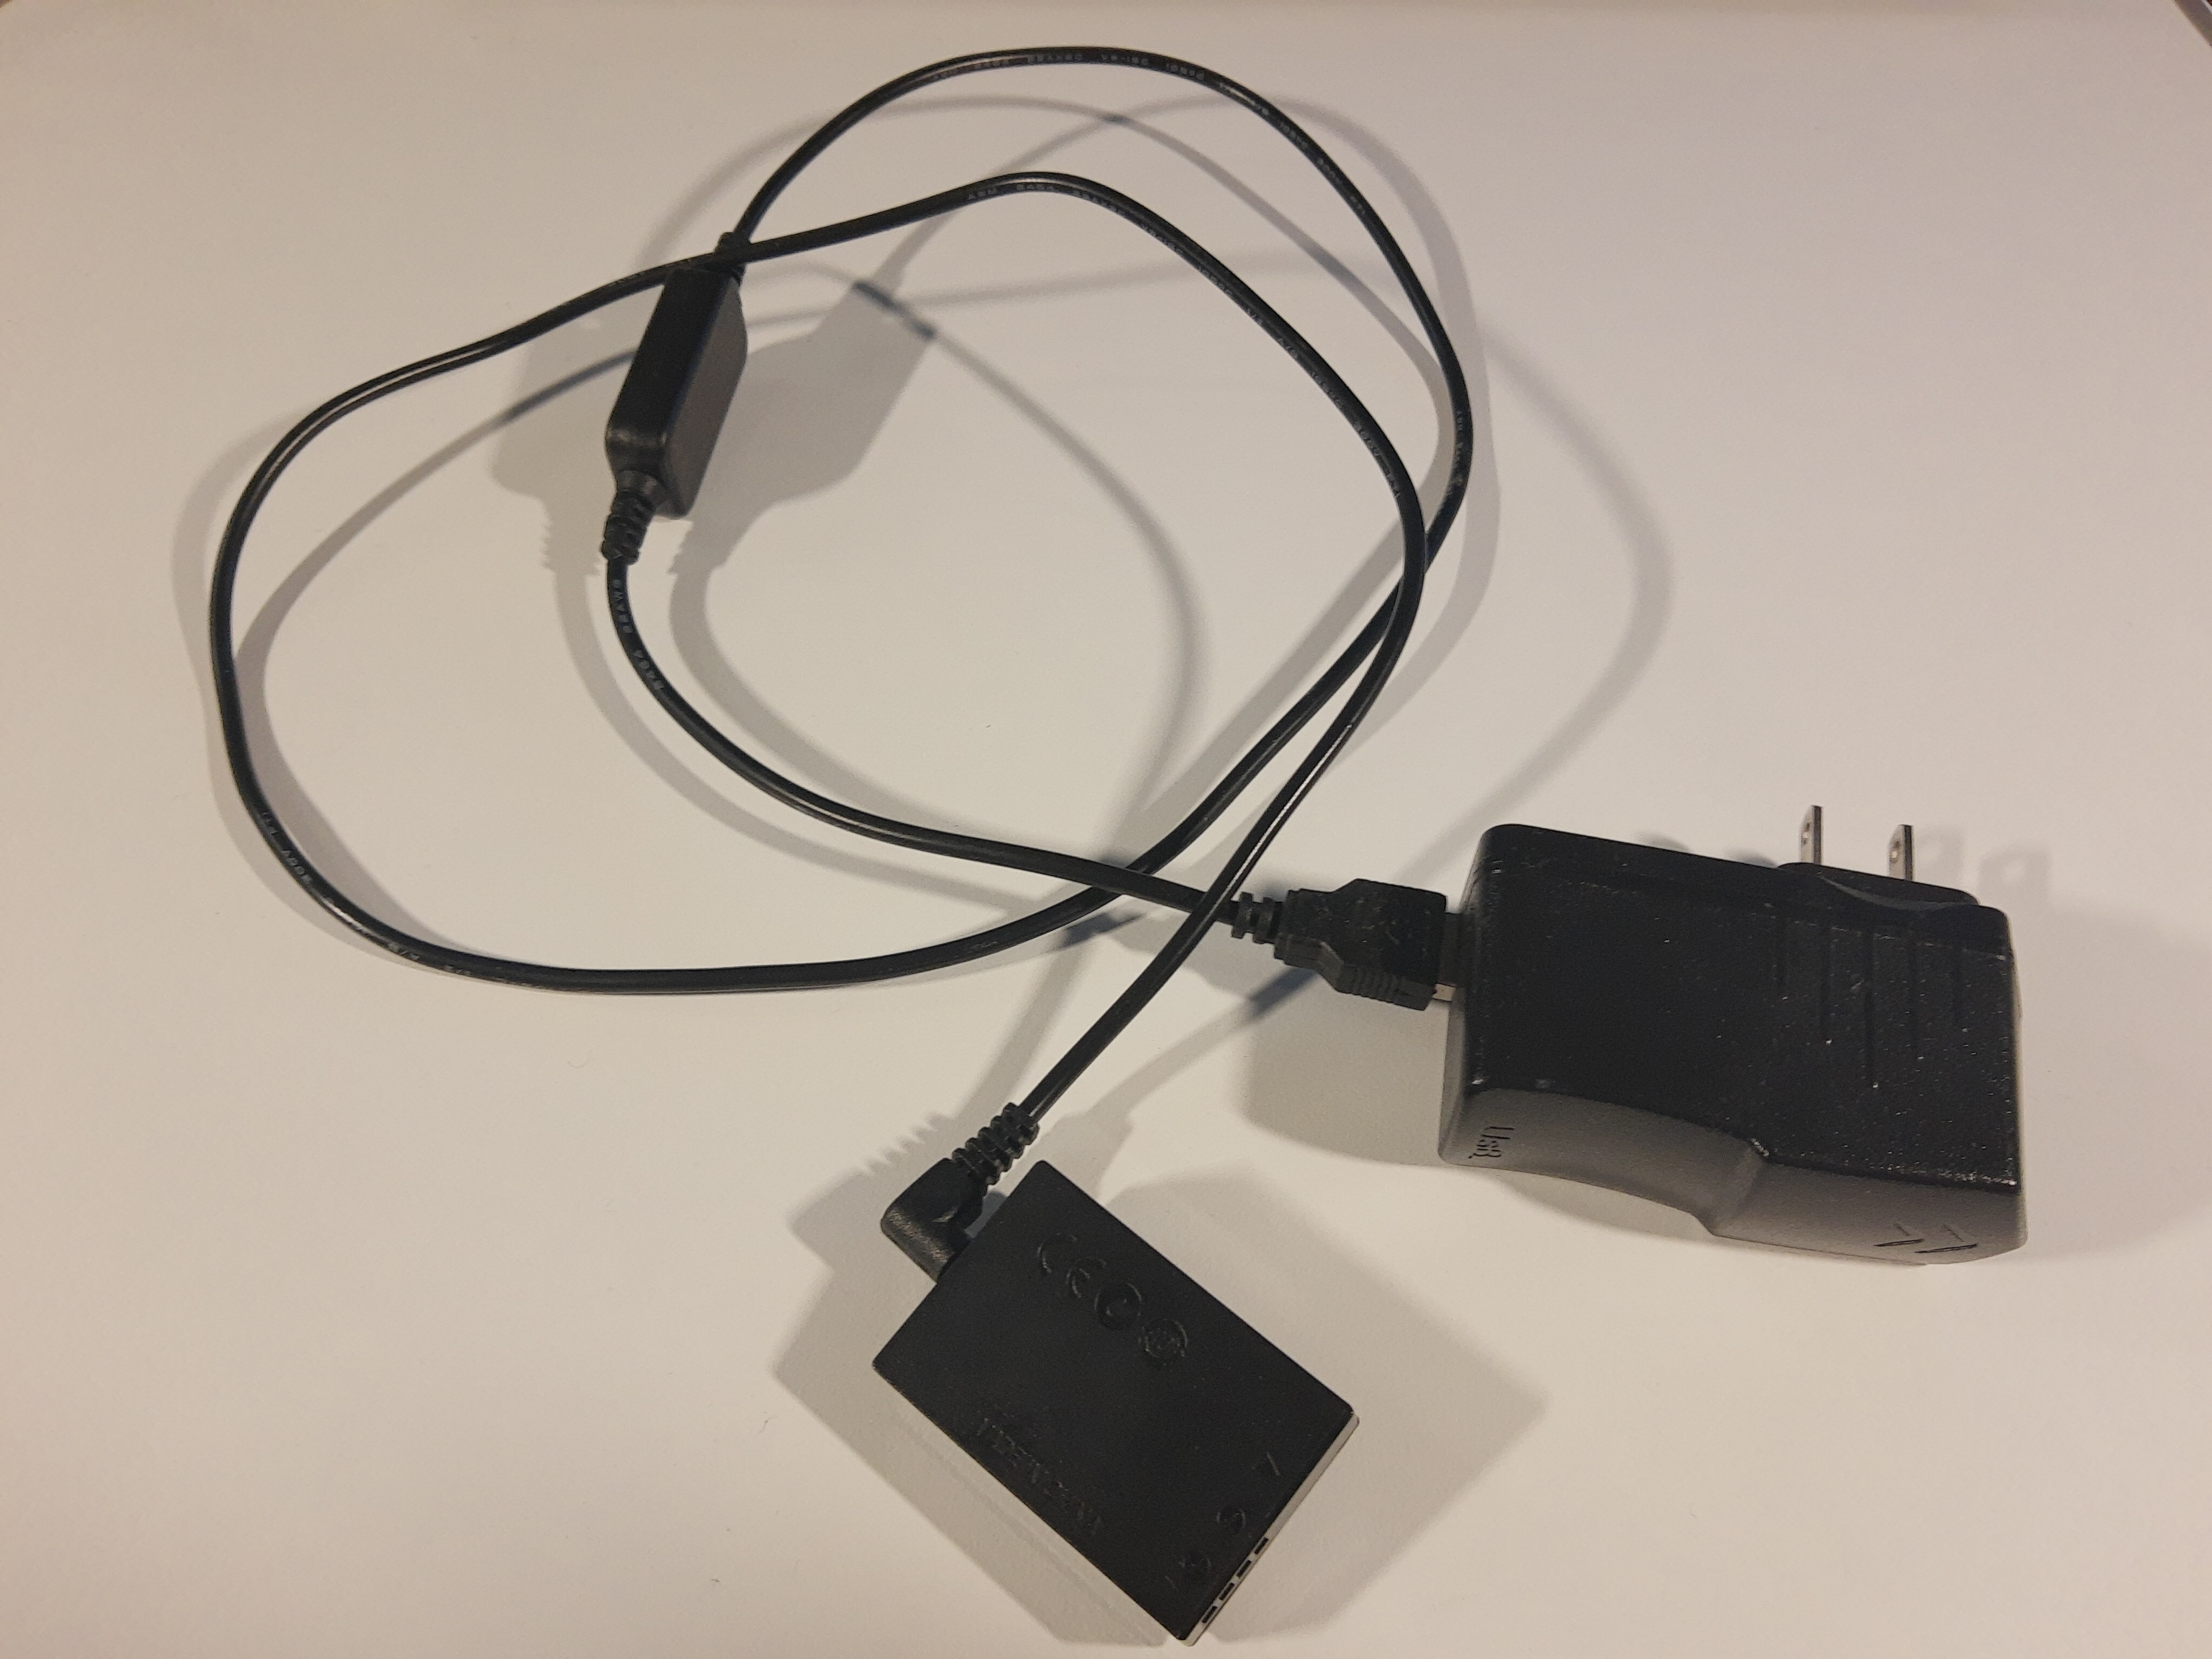
What if you want to take a time-lapse of a full day? With the use of a battery cable and this setup you can overcome such limitations as you are no longer limited by your battery running out. The Android acts as user interface enhancement instead of using gphoto2 commandline directly on the Raspberry Pi. M100 battery cable:
The camera manufacturer provided Android app is not sufficientThe Android app provided here can be modified to monitor for events for which regular manufacture provided Android (in this case Canon) apps for your camera will not have. Want to take picture at a specific time? Take a picture only when you detect something in the field of focus of cell phone camera? Take a picture when you say “action”? You will have to code this yourself for which the Android app introduced in this post provides a great starting point. The programmatic freedom allows one to integrate your camera into a variety of applications. Broken camera screenMay sound like a stretch but I had this happen. Camera menu screen was busted. The app can be useful here for providing a basic screen interface. |
Cameras come with limitations
In this blog I will be using the Canon M100.
In the case of the M100, the camera has a limitation on how long you can take time-lapse photos for. In the image below, three screenshots from the M100 configuration screen show that you can set to take photos every 2 to 4 seconds and up to 900 shots. Combining the two upper limits you can only takes a time-lapse spanning an hour in time.
What if you want to take a time-lapse of a full day? With the use of a battery cable and this setup you can overcome such limitations as you are no longer limited by your battery running out. The Android acts as user interface enhancement instead of using gphoto2 commandline directly on the Raspberry Pi.
M100 battery cable:
The camera manufacturer provided Android app is not sufficient
The Android app provided here can be modified to monitor for events for which regular manufacture provided Android (in this case Canon) apps for your camera will not have. Want to take picture at a specific time? Take a picture only when you detect something in the field of focus of cell phone camera? Take a picture when you say “action”? You will have to code this yourself for which the Android app introduced in this post provides a great starting point.
The programmatic freedom allows one to integrate your camera into a variety of applications.
Broken camera screen
May sound like a stretch but I had this happen. Camera menu screen was busted. The app can be useful here for providing a basic screen interface.
How to Setup the system
With some of the motivations out of the way, we now discuss how to set it all up:
Contents |
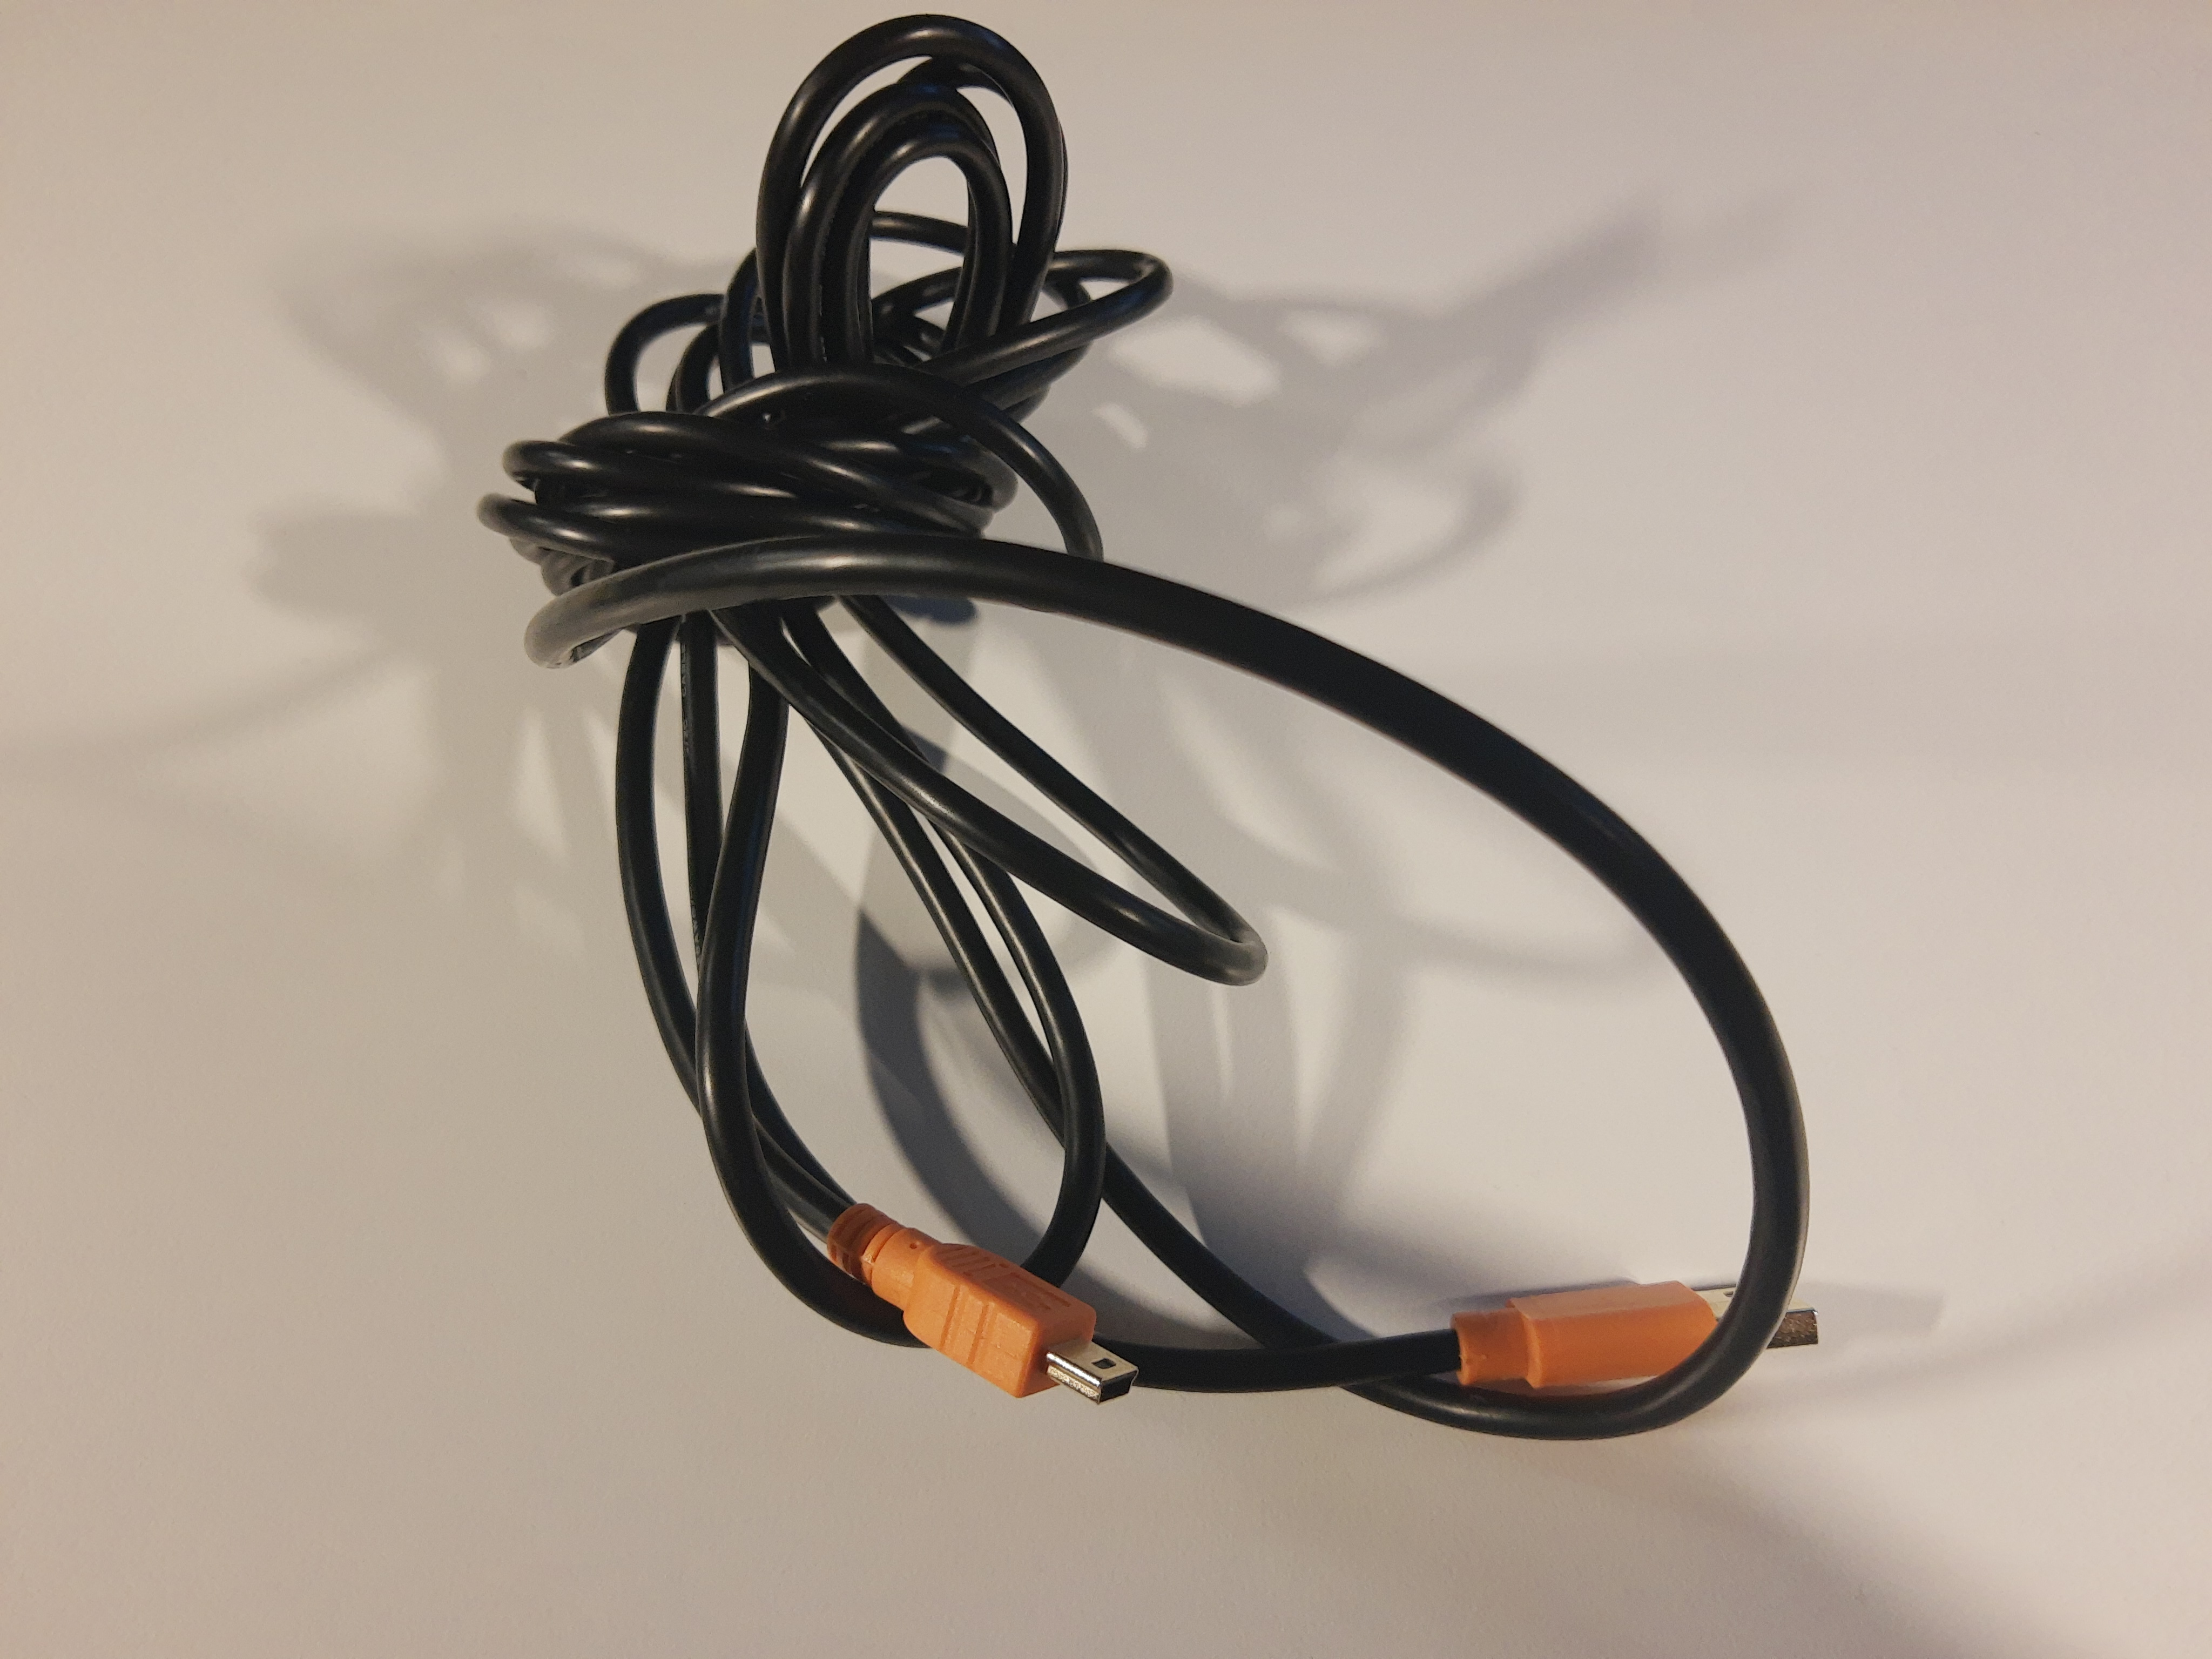
Install gphoto2 on Raspberry PiYou will have to install gphoto2 software. This is a good repository on how to do this. Connect the Camera to the Raspberry PiConnect the camera to the Raspberry Pi. In the case of the M100, I use the USB to mini USB B. Cable below:
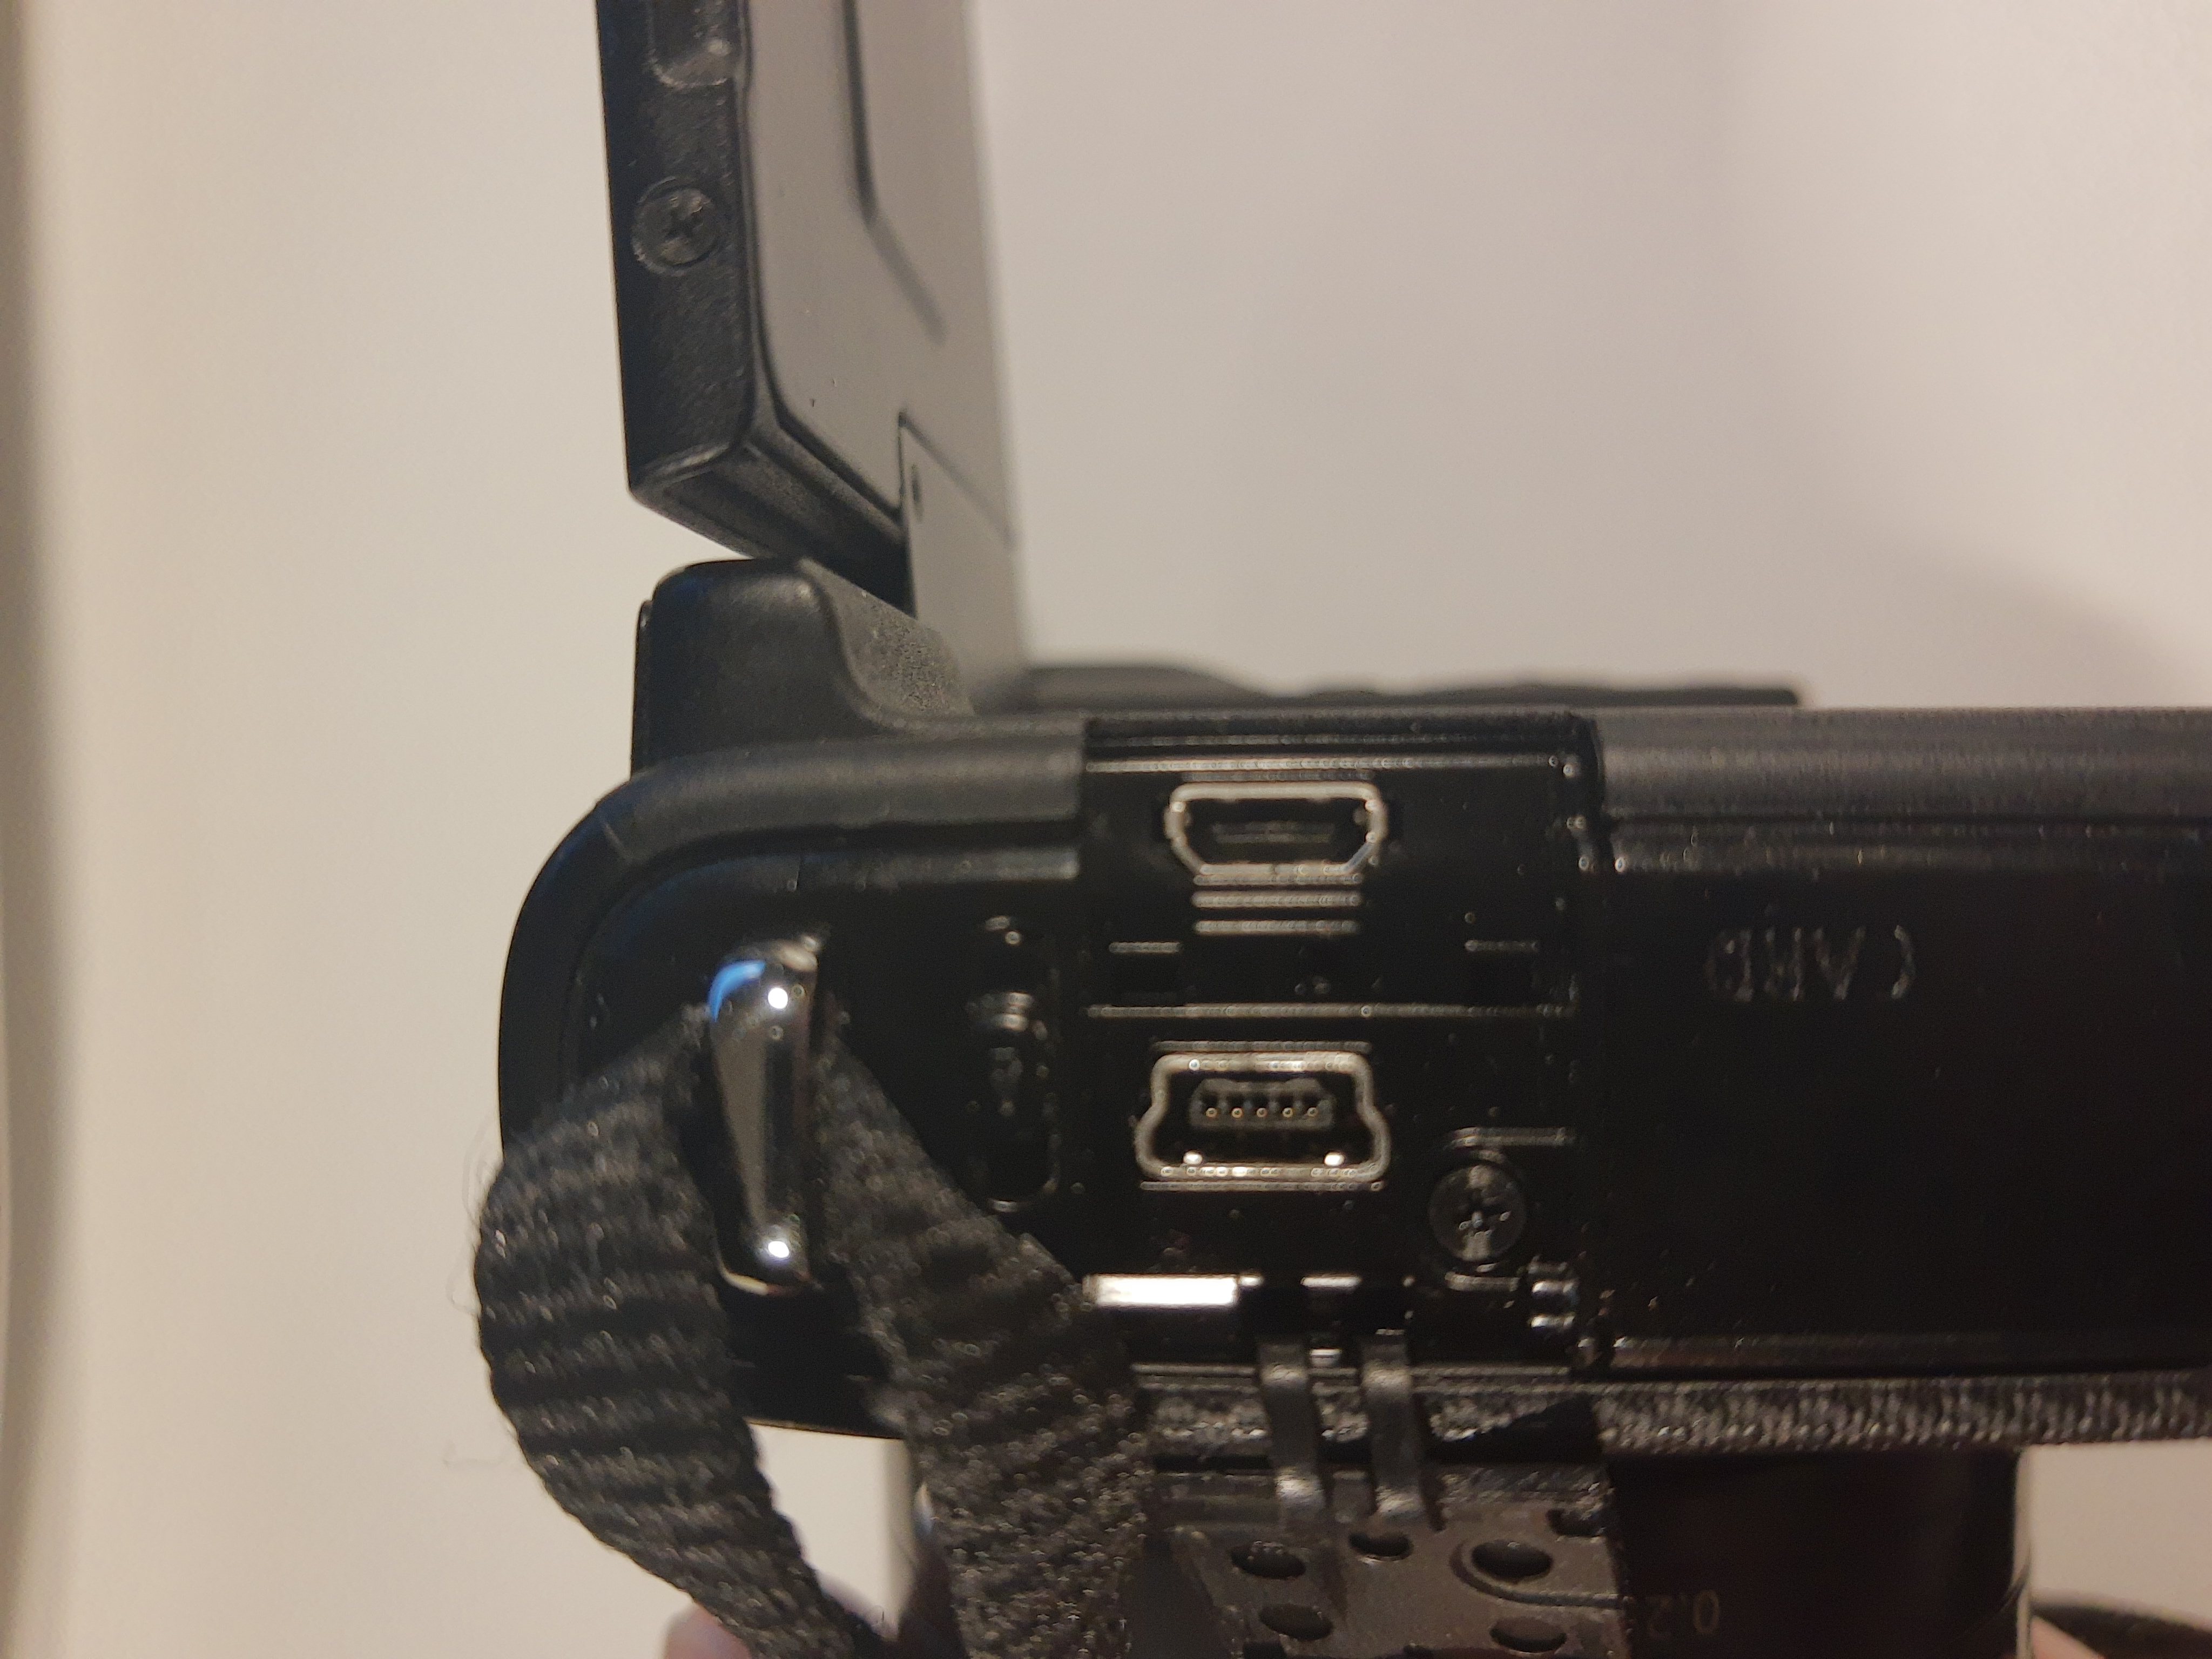
The mini USB B port on the M100 is pictured below.
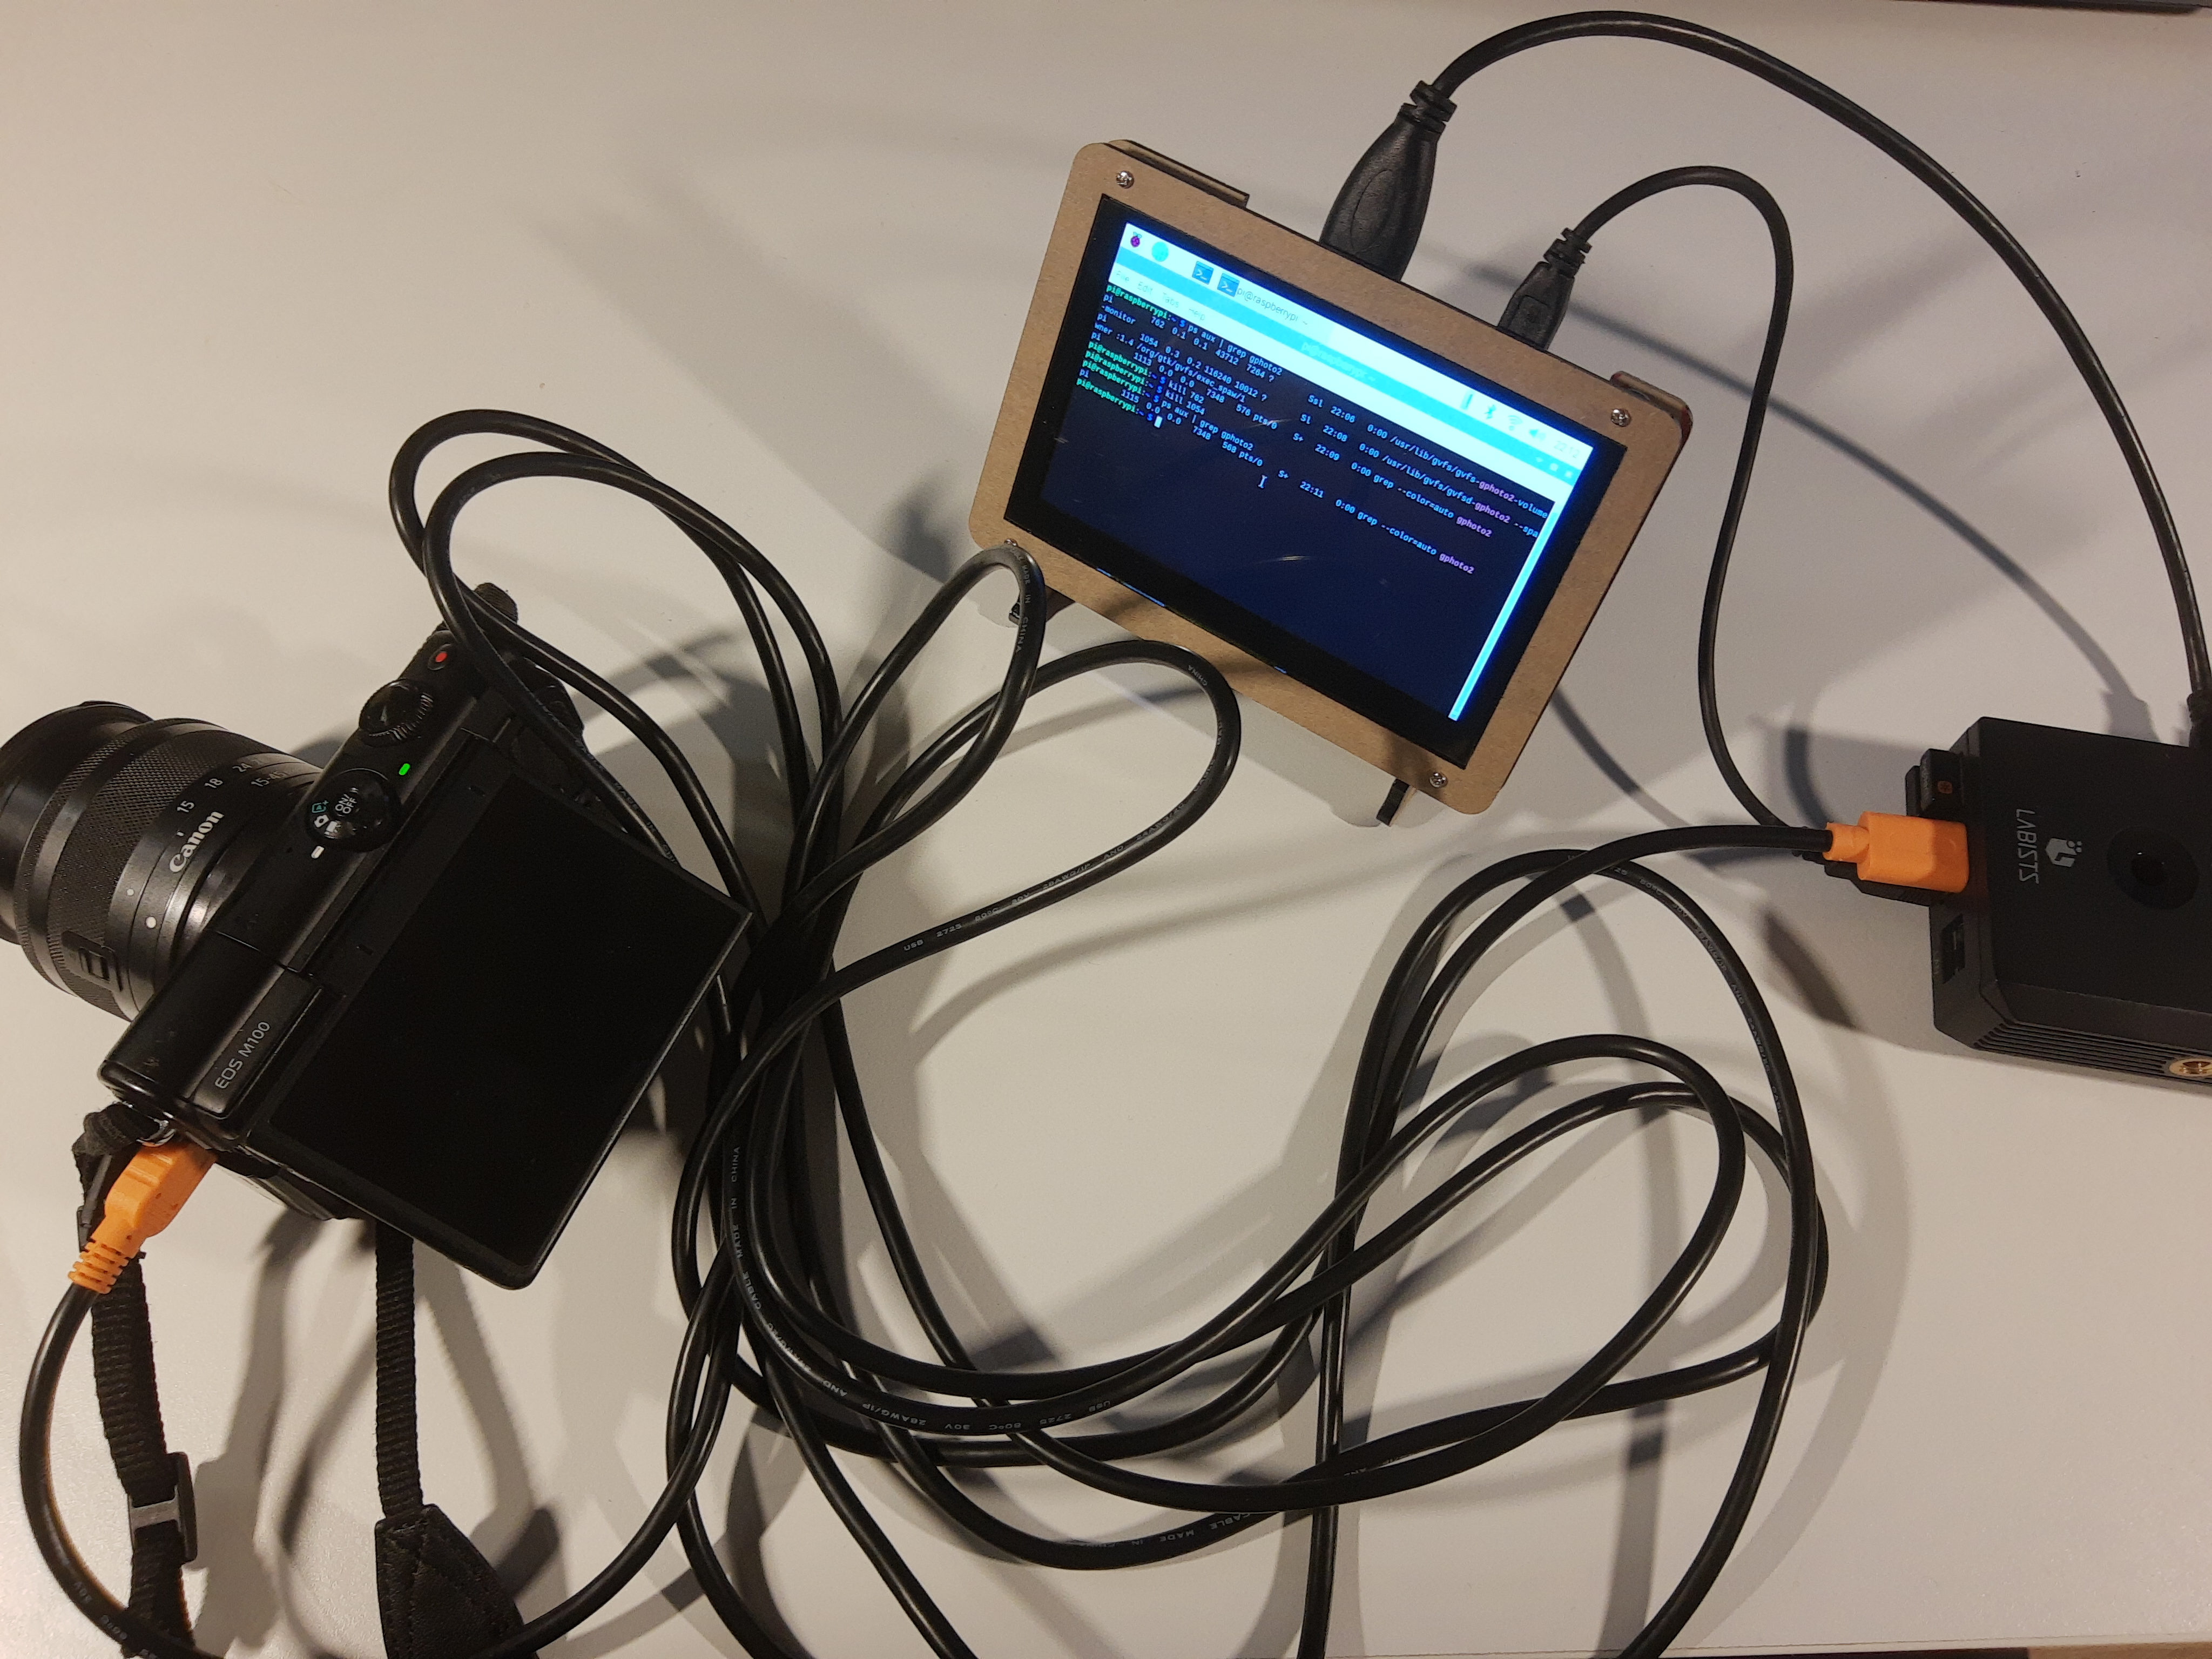
The result will look something like this:
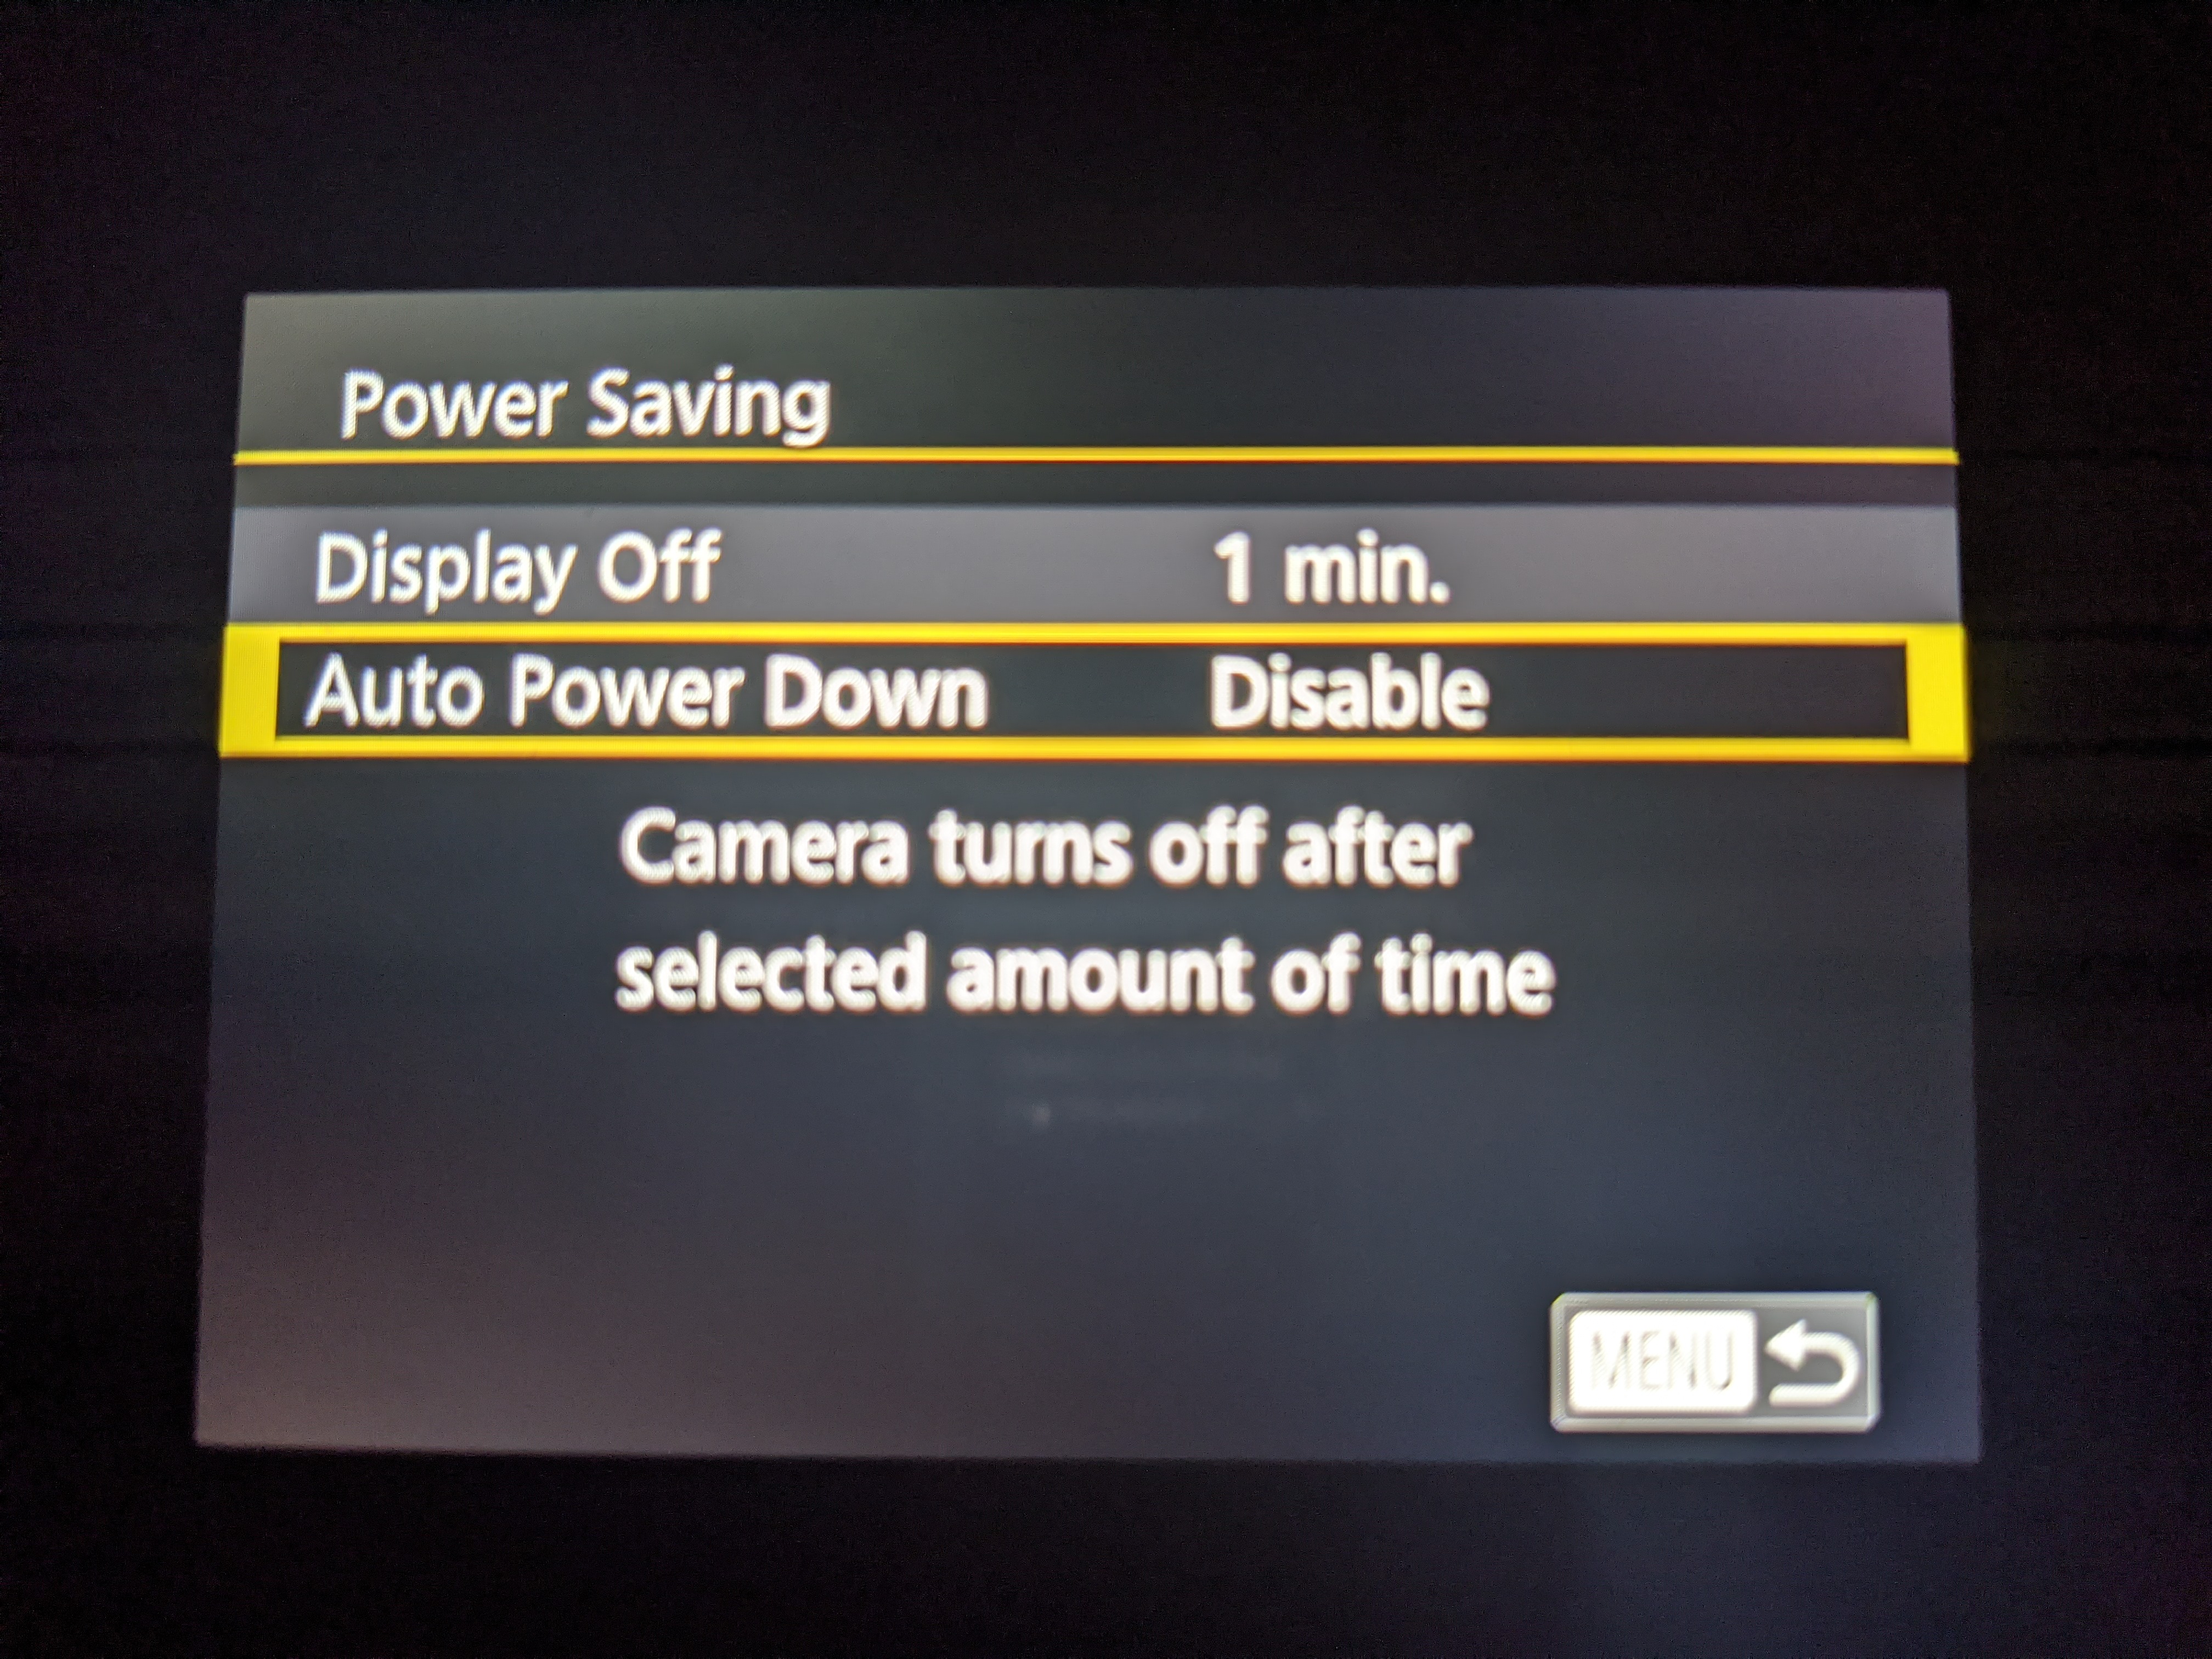
Turn your camera on and see if your camera has a setting to stay on without sleeping. On the M100 the setting looks like:
In the Raspberry Pi terminal run and run
Sometimes taking pictures will fail. In the image above, the failure was due to camera not focusing while in auto focus mode. For the second picture, I had to make sure I had better lighting. gphoto2 supports many cameras to varying degrees. Your debug process and figuring out how to run your camera will thus vary. Be patient. By searching your error on a search engine you can usually find a thread on gphoto2’s repository or some stackoverflow post discussing a potential workaround. Here are some links that I found useful: …happy debugging! Connecting Raspberry Pi to Android PhoneConnect your phone and Raspberry Pi together. There are many instructions online on how to do this like here. Setting up the Bluetooth server on Raspberry PiOn the Raspberry Pi you will have to run The python script can be found in github code here. Apply a setting to your Raspberry Pi so it does not fall asleep and stays on. If you experience errors: make sure to install the required packages. For potential debugging when failing to advertise I found this to be helpful. |
Install gphoto2 on Raspberry Pi
You will have to install gphoto2 software. This is a good repository on how to do this.
Connect the Camera to the Raspberry Pi
Connect the camera to the Raspberry Pi. In the case of the M100, I use the USB to mini USB B. Cable below:
The mini USB B port on the M100 is pictured below.
The result will look something like this:
Turn your camera on and see if your camera has a setting to stay on without sleeping. On the M100 the setting looks like:
In the Raspberry Pi terminal run
ps aux | grep gphoto
and run kill on the non grep results. Next run
gphoto2 --shell
>trigger-capture
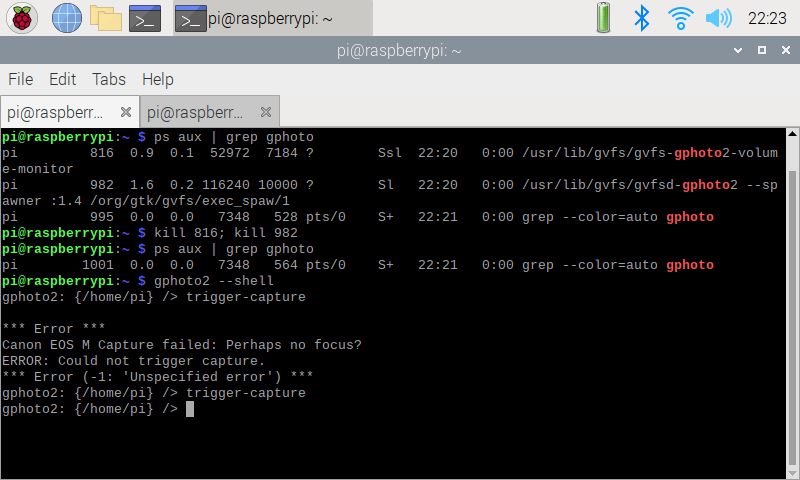
Sometimes taking pictures will fail. In the image above, the failure was due to camera not focusing while in auto focus mode. For the second picture, I had to make sure I had better lighting.
gphoto2 supports many cameras to varying degrees. Your debug process and figuring out how to run your camera will thus vary. Be patient. By searching your error on a search engine you can usually find a thread on gphoto2’s repository or some stackoverflow post discussing a potential workaround. Here are some links that I found useful:
…happy debugging!
Connecting Raspberry Pi to Android Phone
Connect your phone and Raspberry Pi together. There are many instructions online on how to do this like here.
Setting up the Bluetooth server on Raspberry Pi
On the Raspberry Pi you will have to run
sudo python server.py
The python script can be found in github code here.
Apply a setting to your Raspberry Pi so it does not fall asleep and stays on.
If you experience errors: make sure to install the required packages. For potential debugging when failing to advertise I found this to be helpful.
Intermission
If you followed instructions above you now have
- Bluetooth-paired the Android phone and Raspberry Pi
- Launched the Bluetooth server on the Raspberry Pi
- Connected your camera to the Raspberry Pi
- Built and installed the application on your Android.
Final setup result:
Contents |
Physical viewFor illustration purposes I have setup the Raspberry Pi and camera.
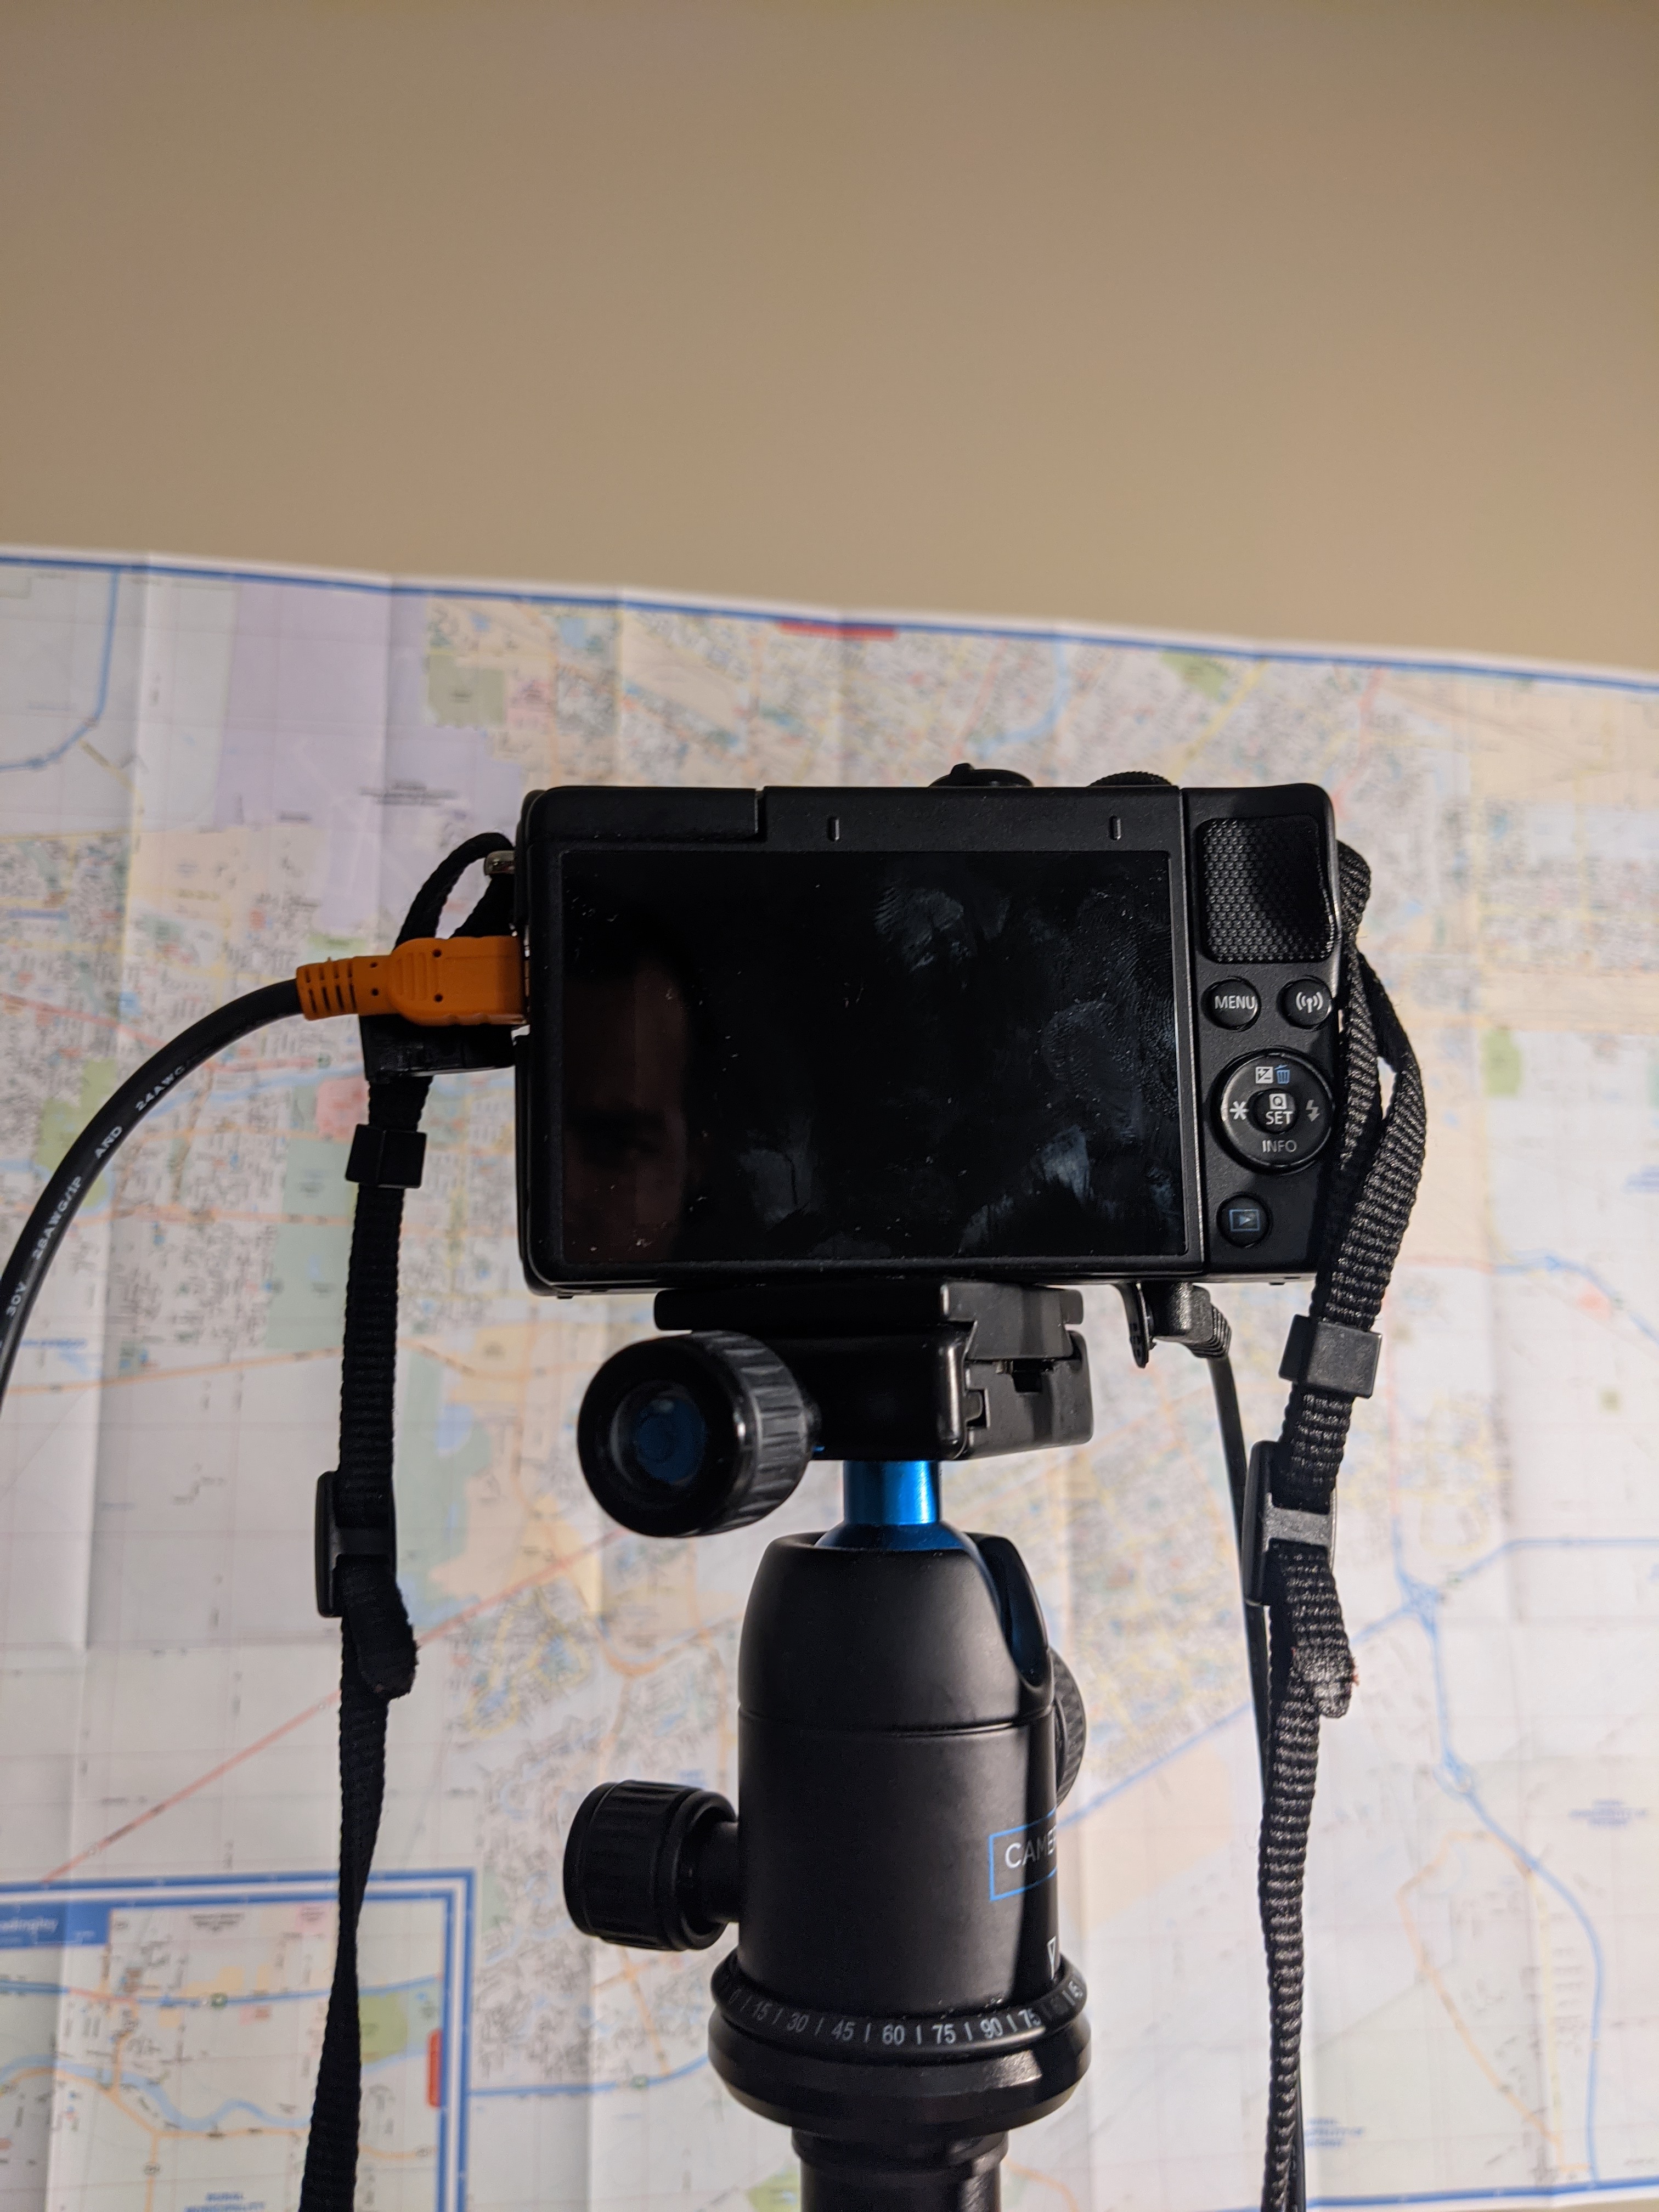
The camera is connected to the Raspberry Pi and the battery is cable powered.
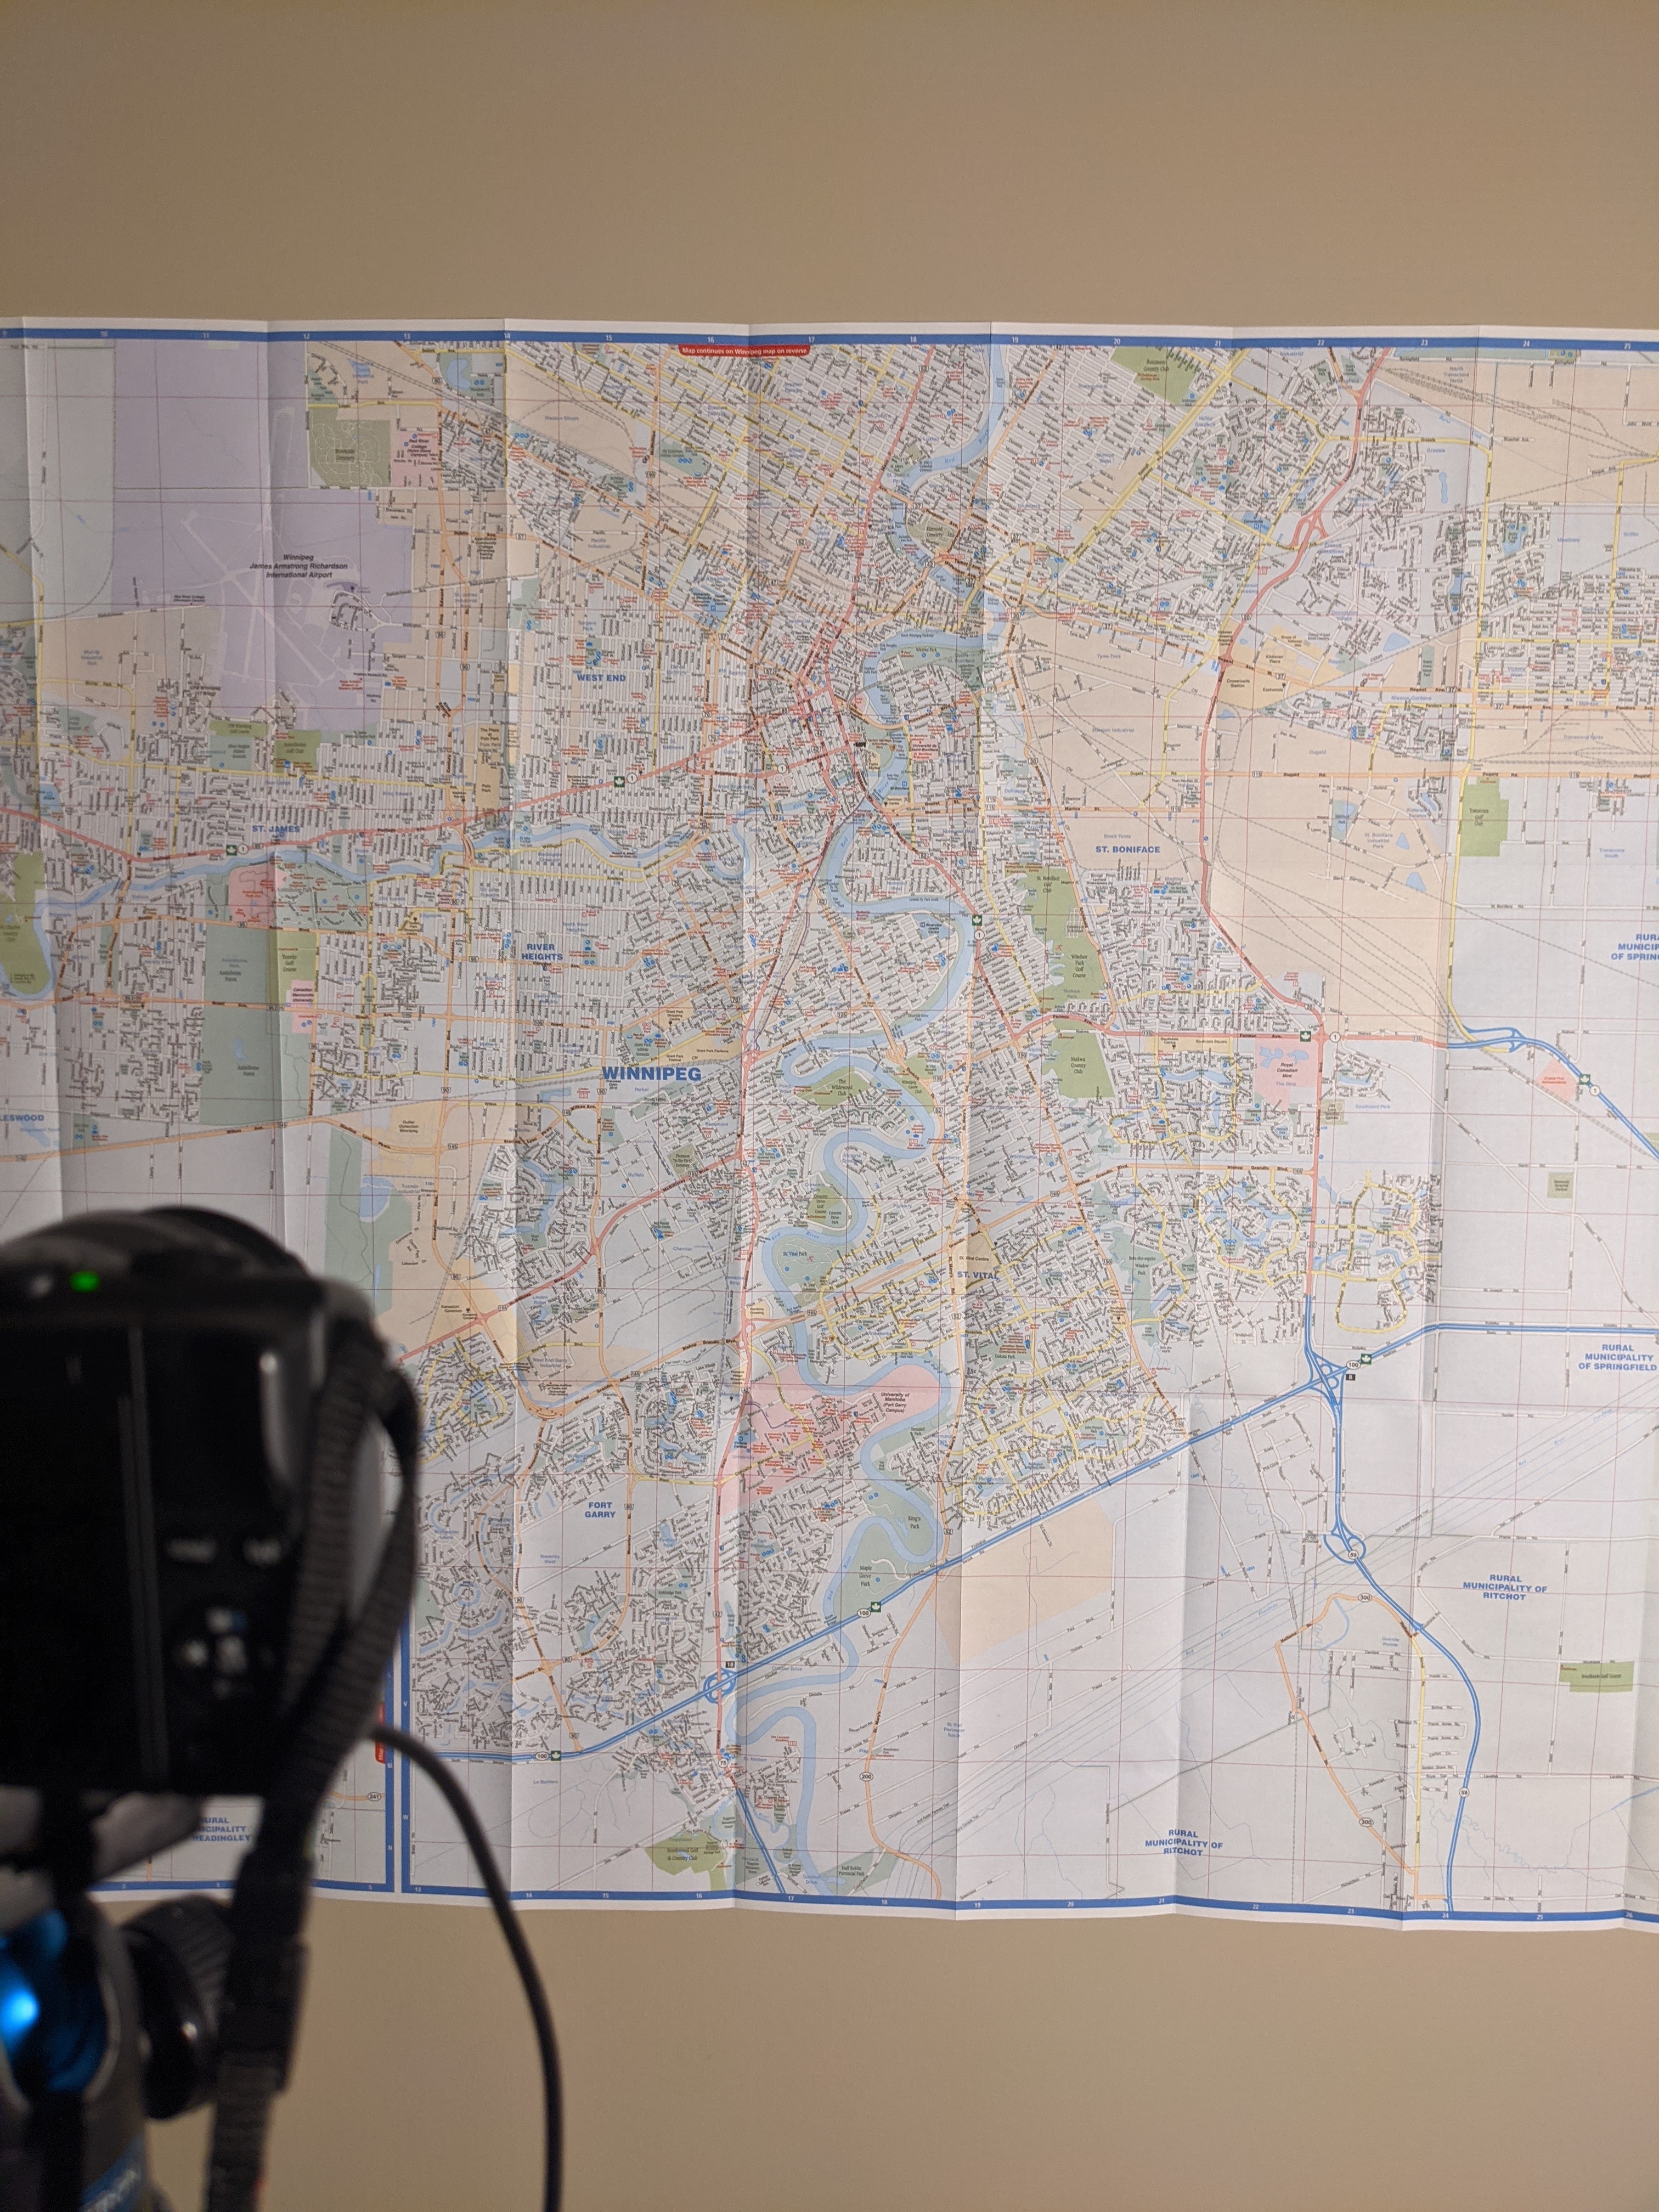
The test subject image here is a map of Winnipeg:
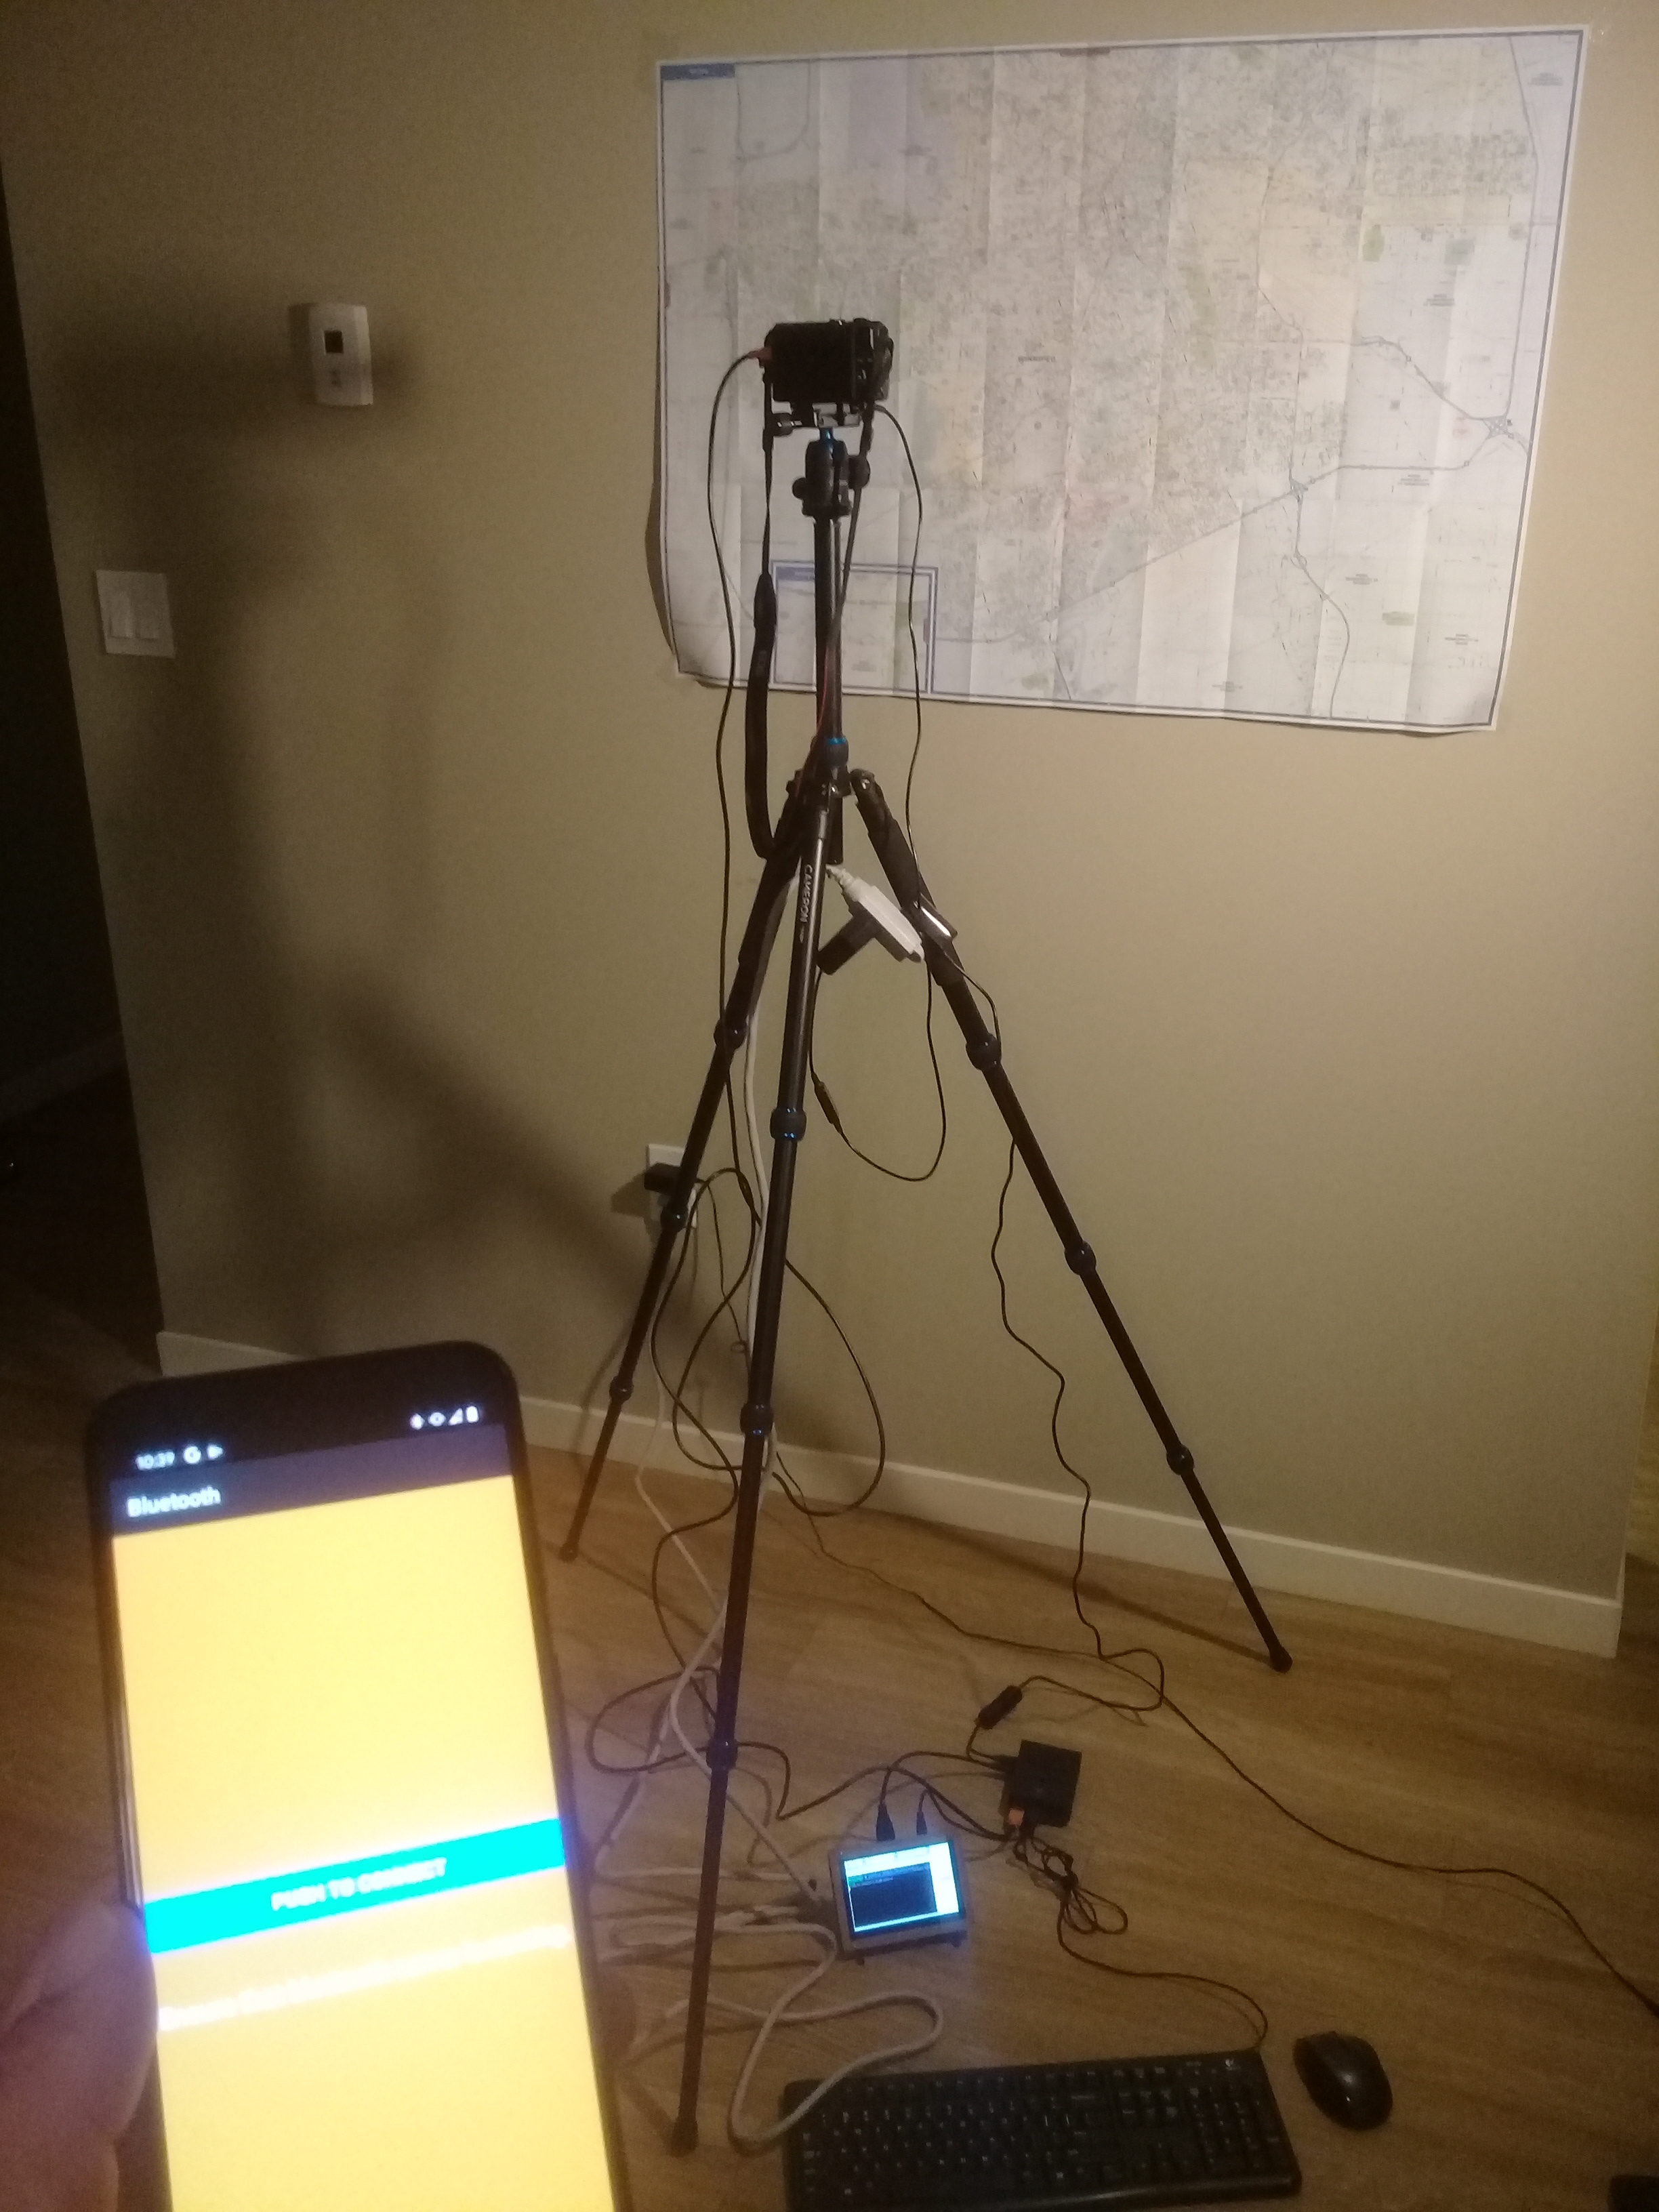
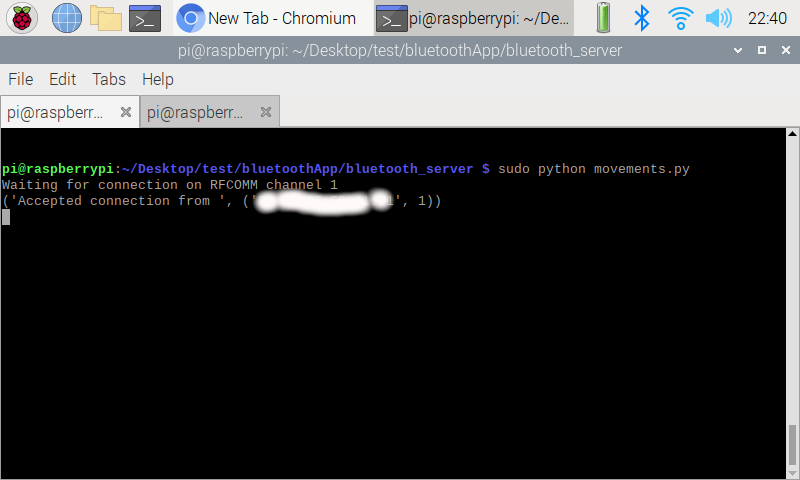
The Bluetooth server on the Raspberry Pi is running and waiting for a connection. Running the Android Phone AppNow let us launch the Android application which is called “Bluetooth”. The landing page will look like 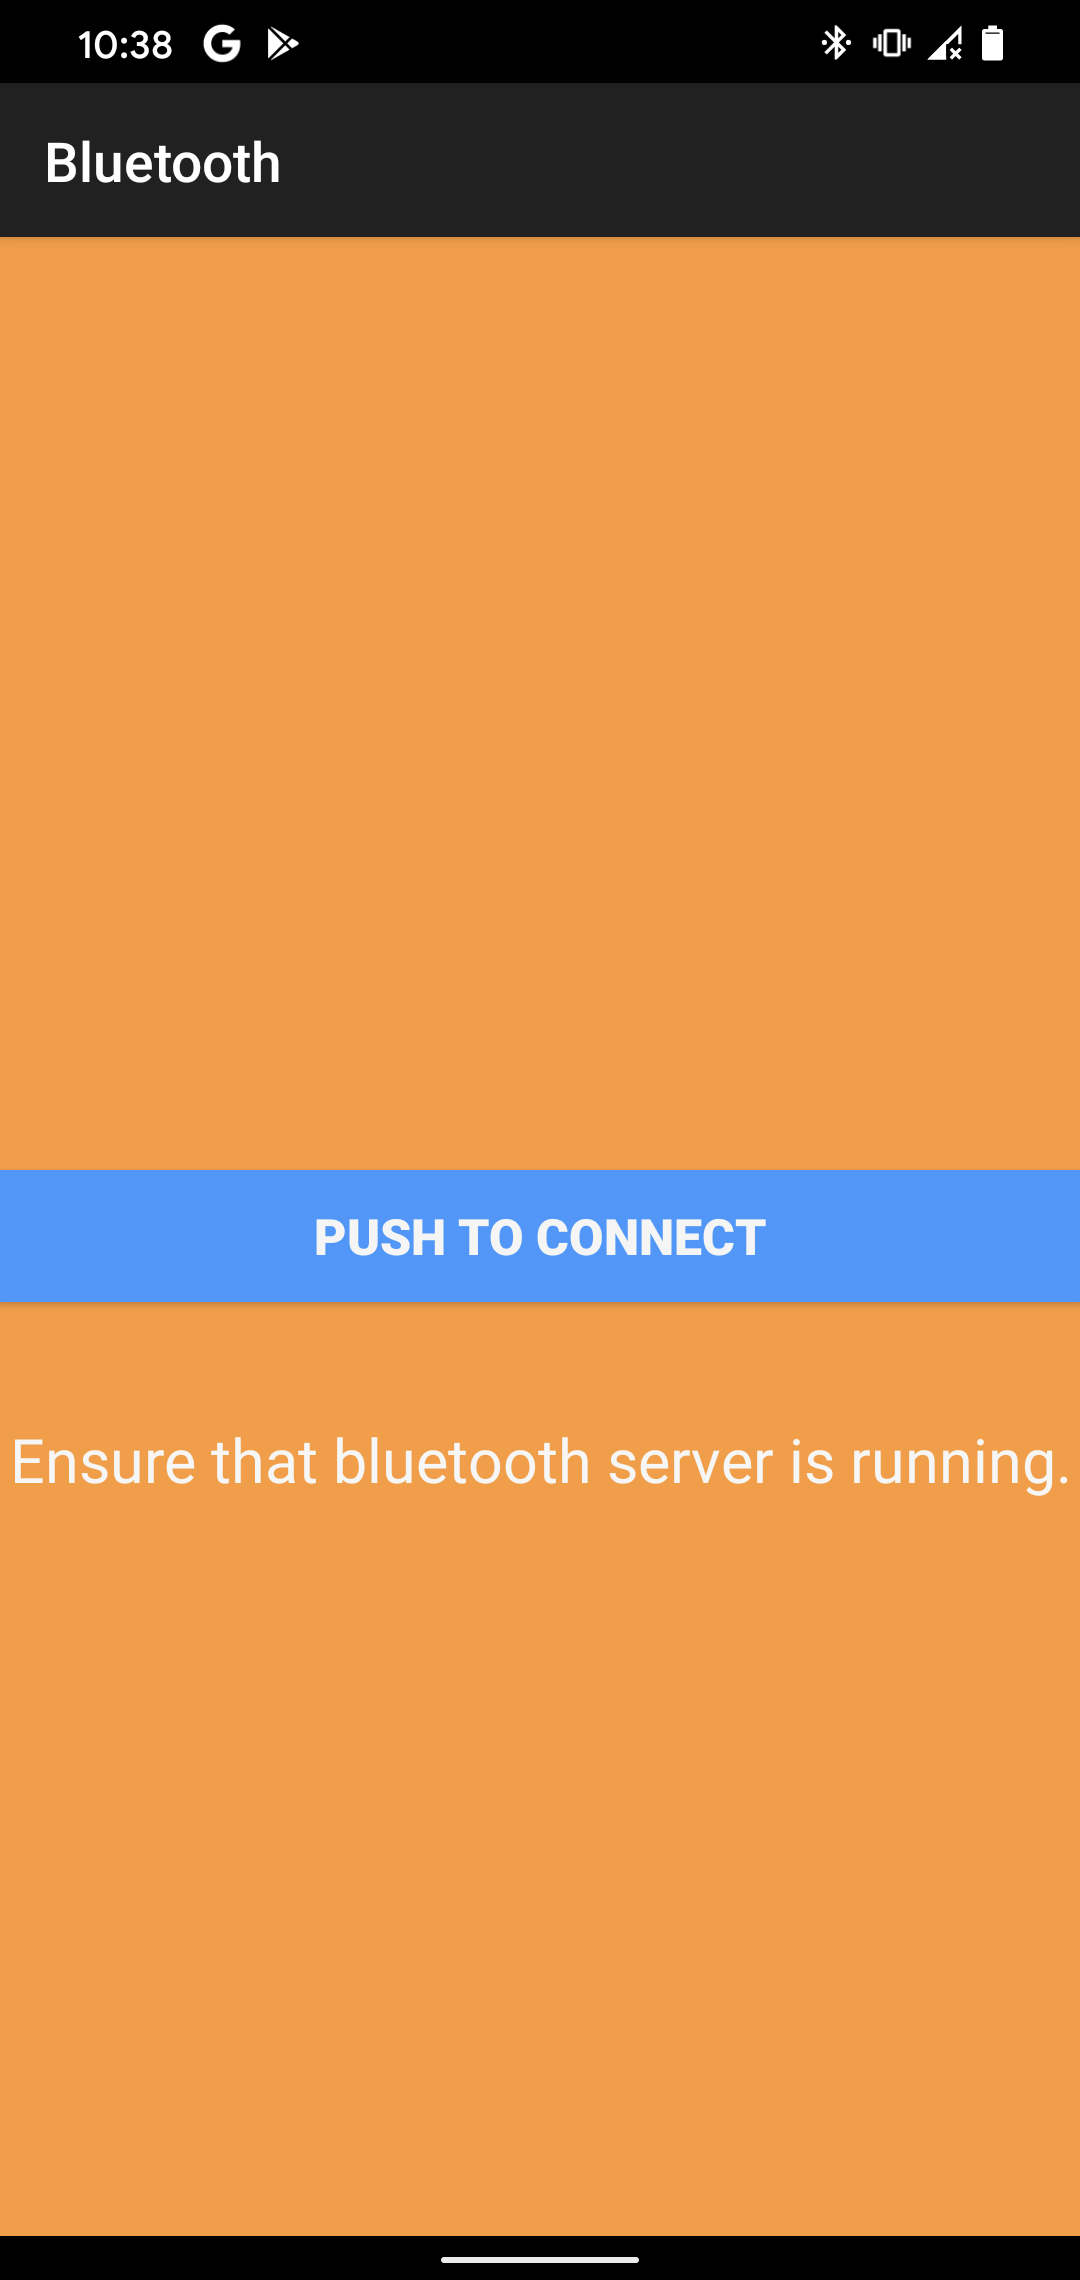
Here is me holding the phone:
After pressing connect you will be redicted to 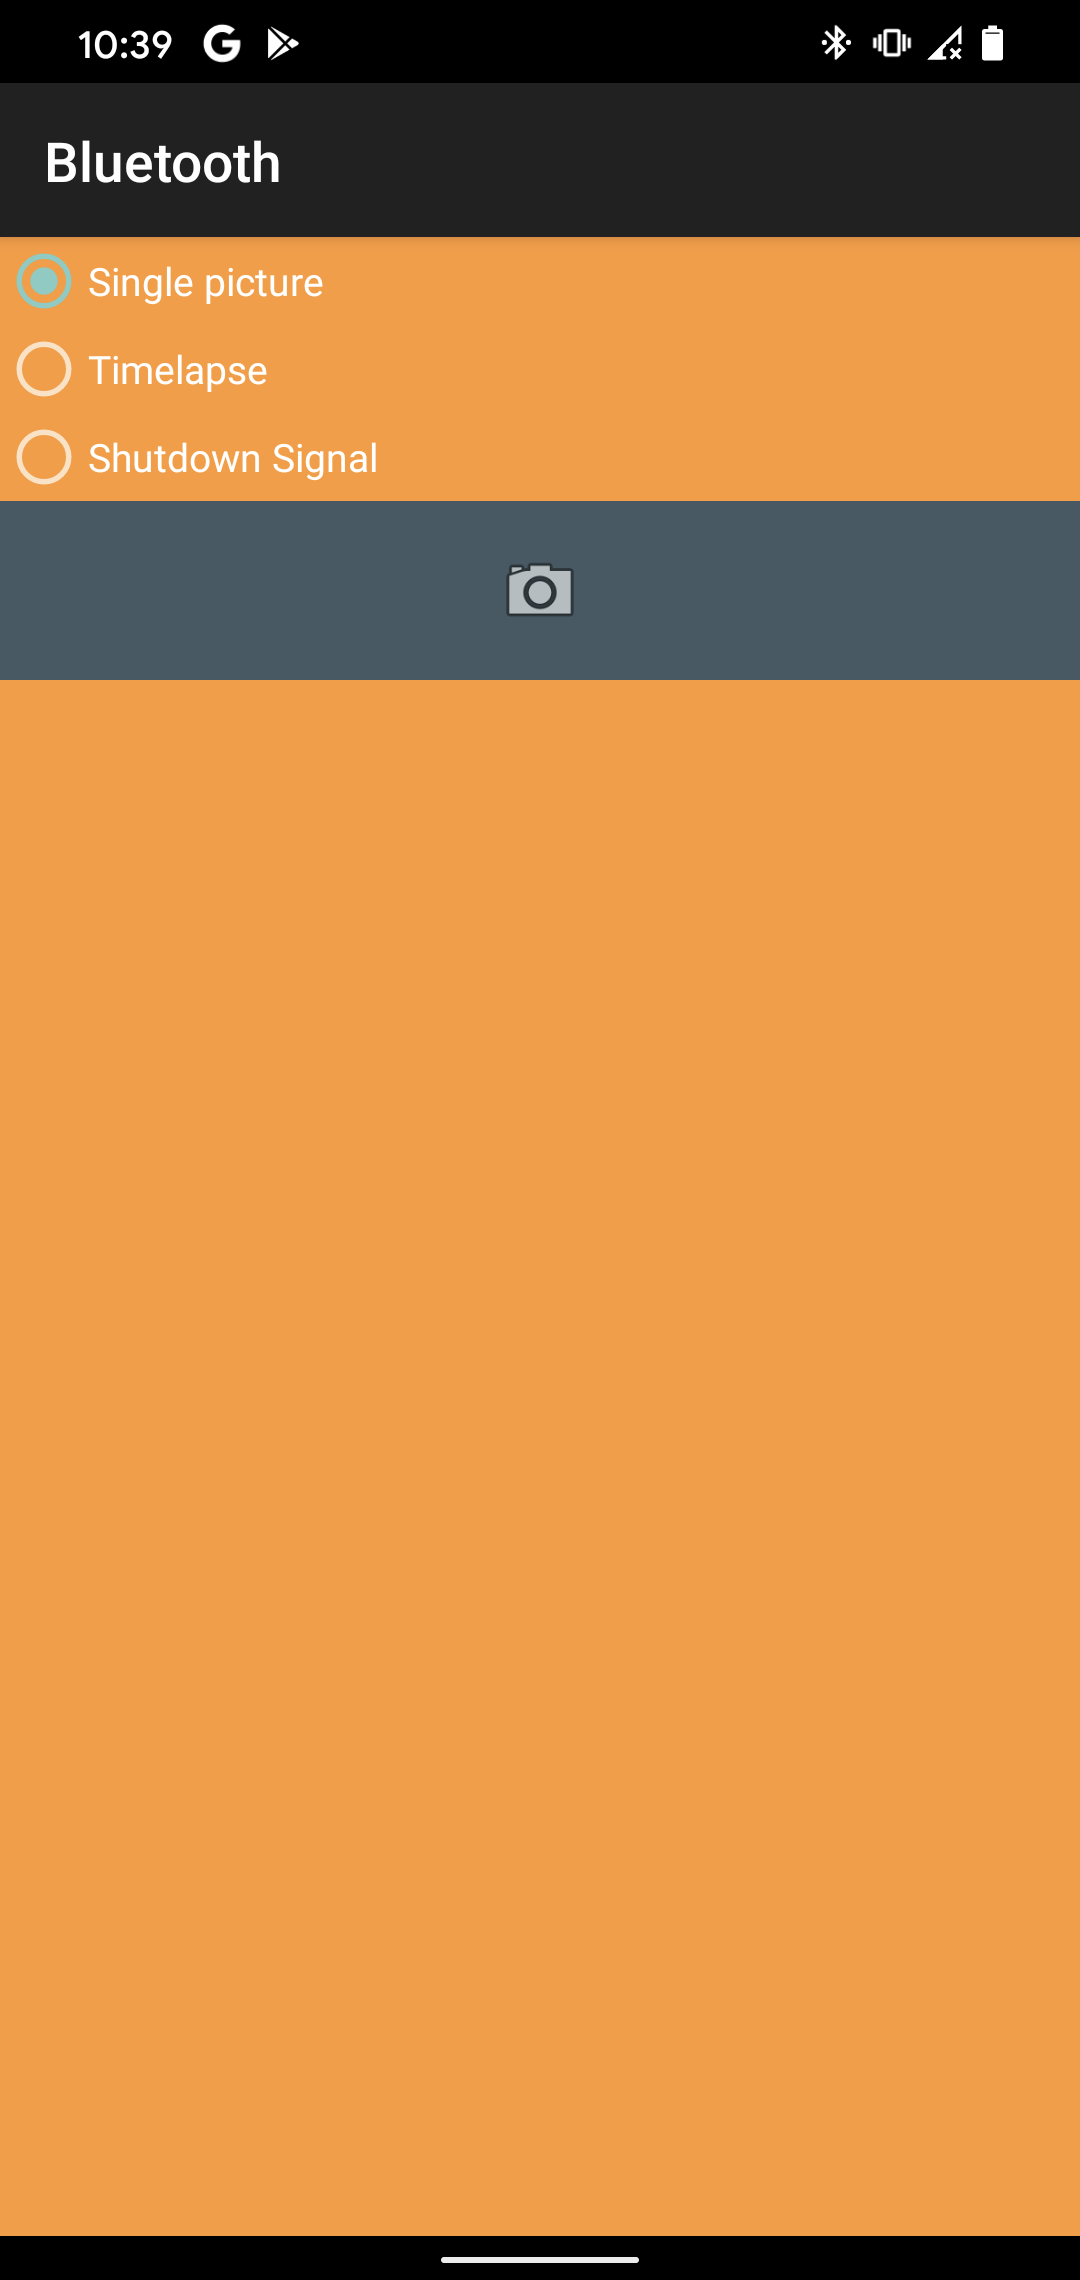
And the Raspberry Pi will accept the connection:
Server reactionWhen selecting “Single picture” and pressing the camera button you will see: 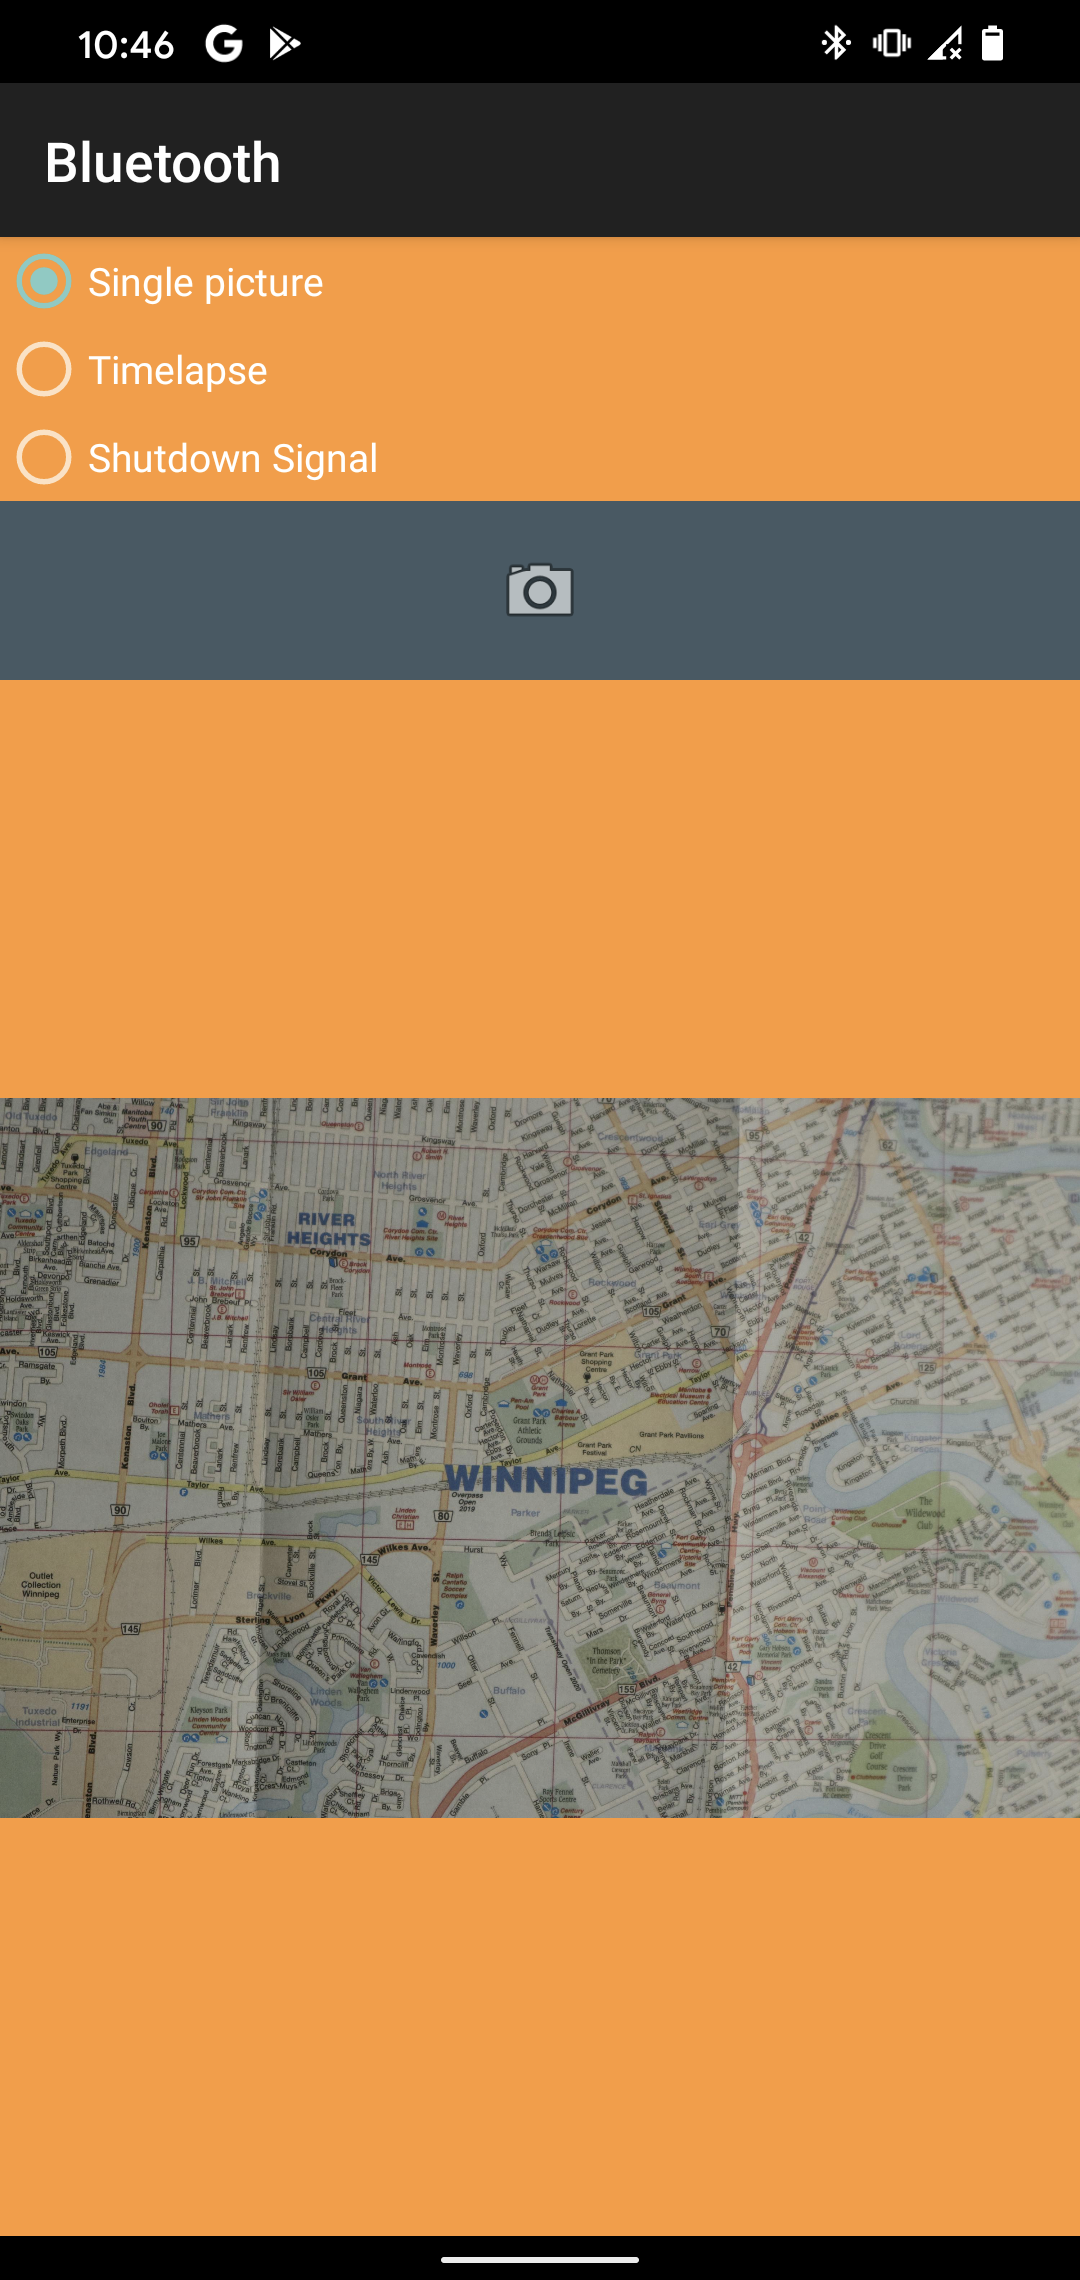
The Bluetooth server will reflect these pictures taken:
The picture is also saved to the SD card of the camera. The other option here is to take a time-lapse: 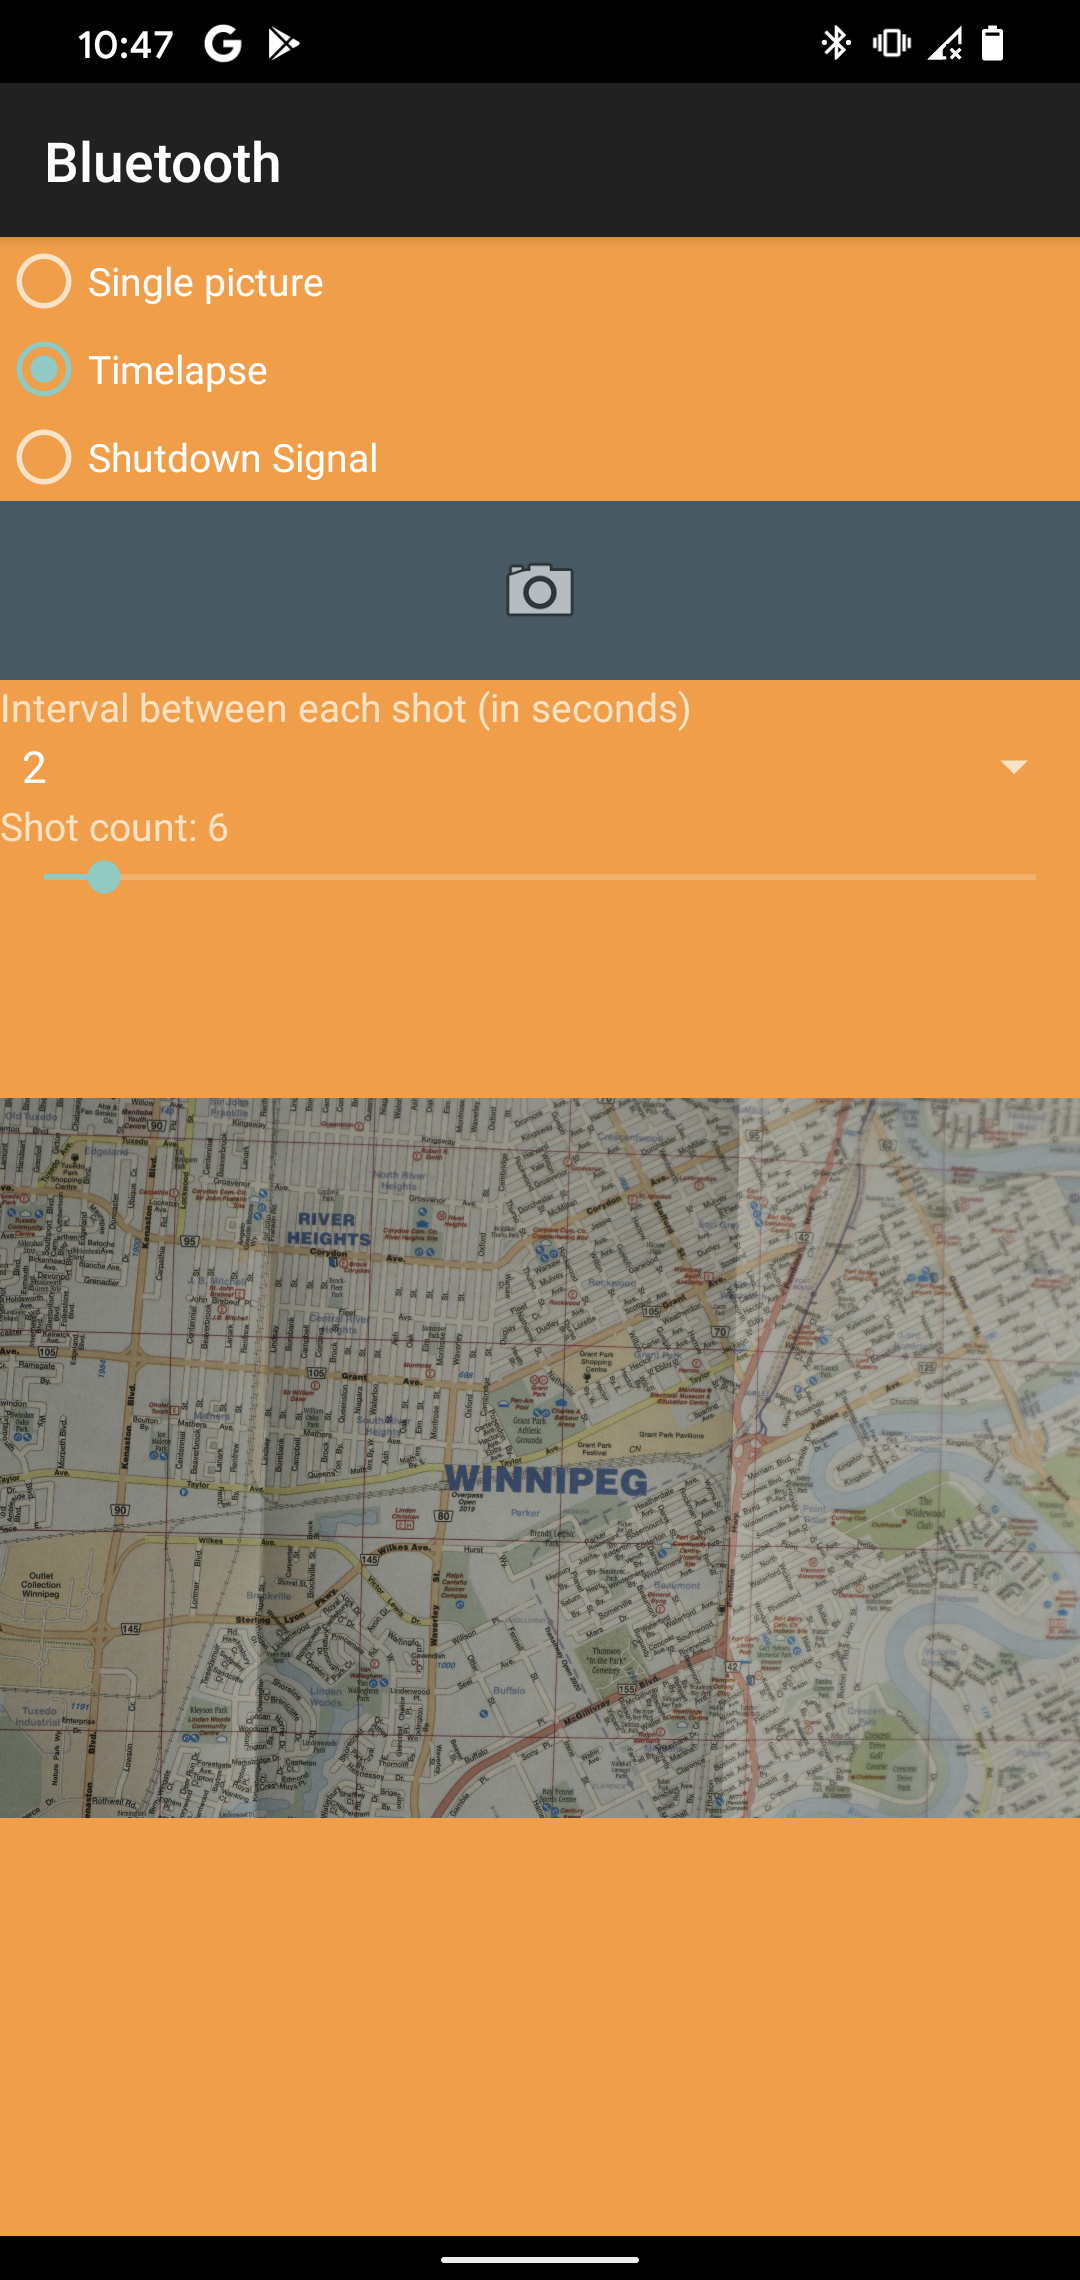
The “Shutdown Signal” is for when you want to disconnect and quit the Bluetooth server. The app will then redict you back to the landing page. |
Physical view
For illustration purposes I have setup the Raspberry Pi and camera.
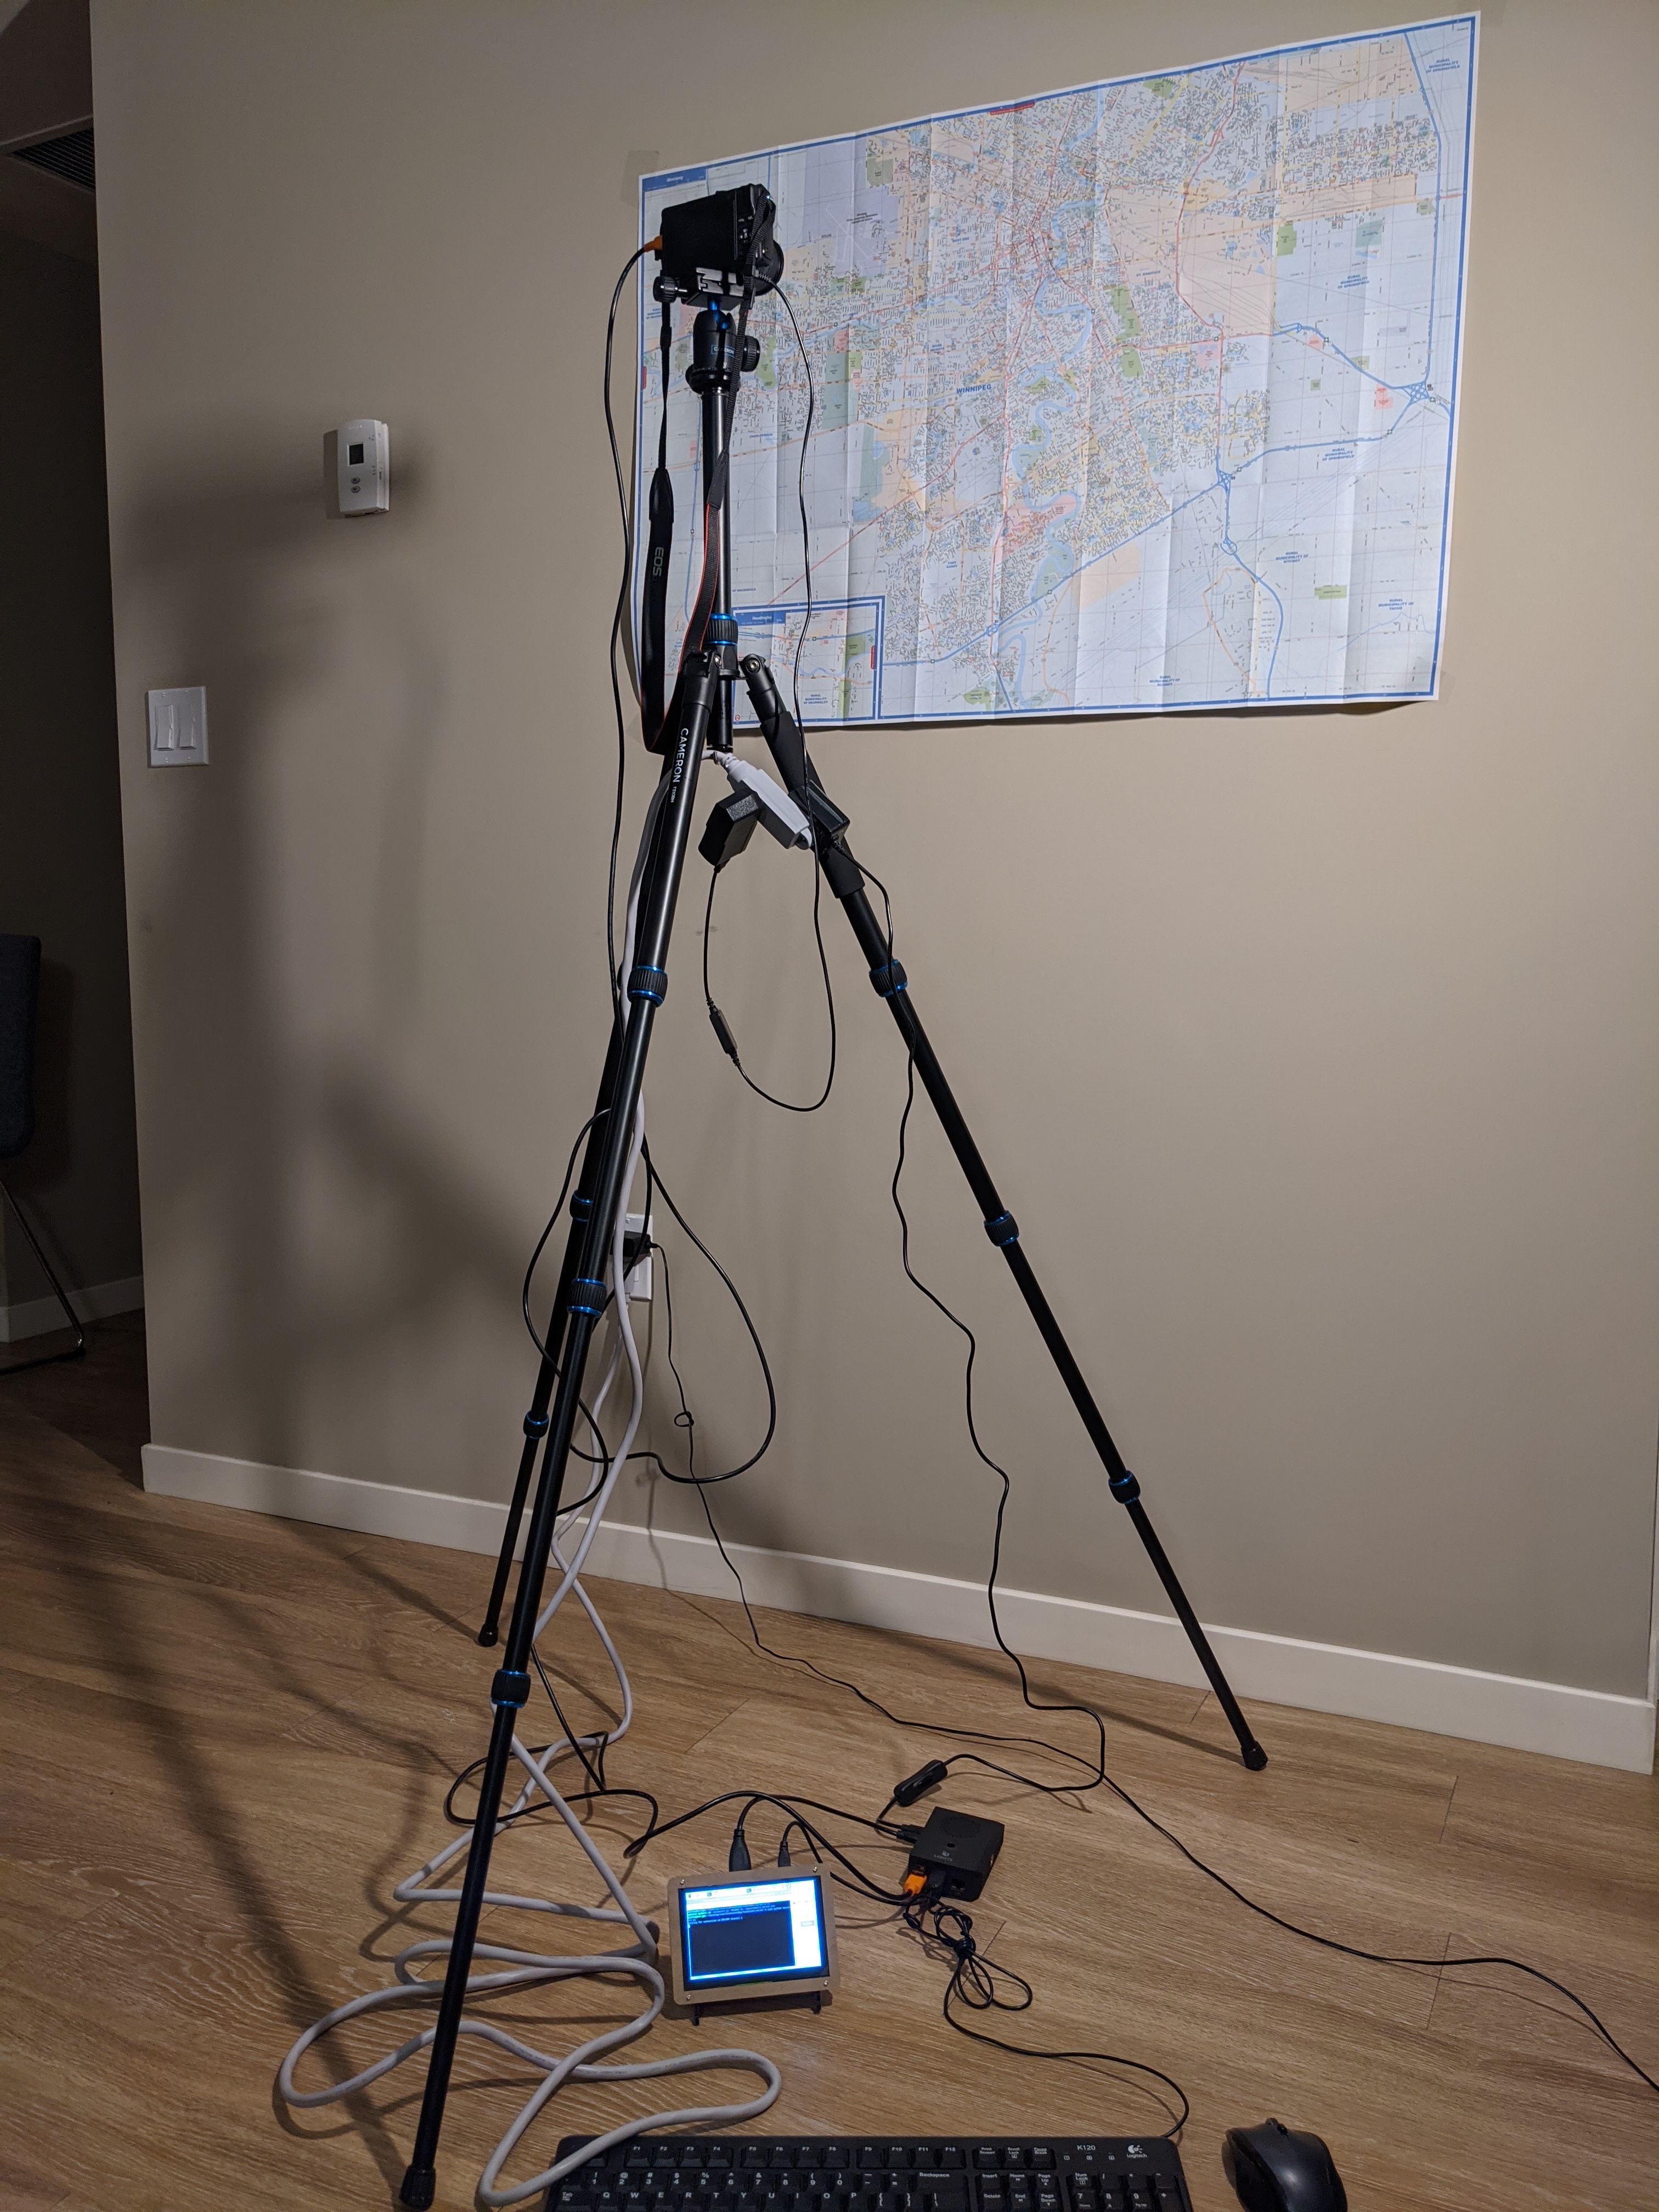
The camera is connected to the Raspberry Pi and the battery is cable powered.
The test subject image here is a map of Winnipeg:
The Bluetooth server on the Raspberry Pi is running and waiting for a connection.
Running the Android Phone App
Now let us launch the Android application which is called “Bluetooth”. The landing page will look like
Here is me holding the phone:
After pressing connect you will be redicted to
And the Raspberry Pi will accept the connection:
Server reaction
When selecting “Single picture” and pressing the camera button you will see:
The Bluetooth server will reflect these pictures taken:
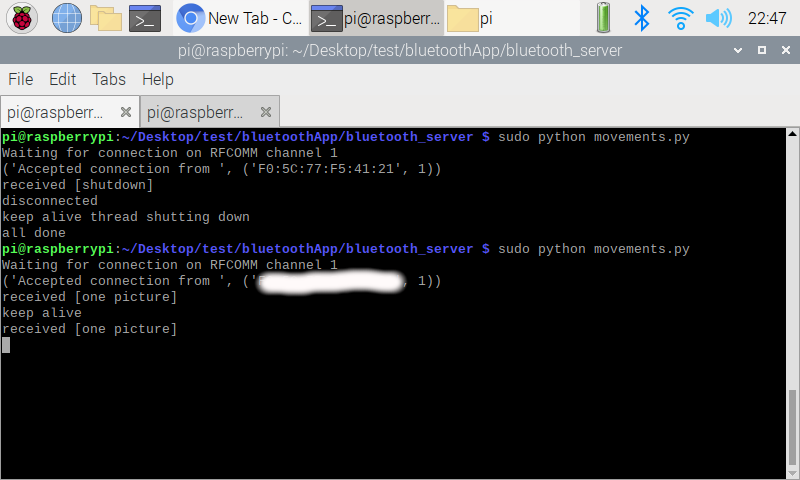
The picture is also saved to the SD card of the camera.
The other option here is to take a time-lapse:
The “Shutdown Signal” is for when you want to disconnect and quit the Bluetooth server. The app will then redict you back to the landing page.
Time-lapse example
Here is an example of the time-lapse feature. After the pictures were taken I combined them to form a gif. Earlier, I suggested that the M100’s time-lapse feature could be extended for a whole day. I was a bit lazy to do that for this post and did something that is quicker and would take up less memory:
Now the skeptical reader might ask: “Why do you need an Android app to send a single command to start executing a time-lapse or even a single photograph? Why not modify server.py and run the code straight on the Raspberry Pi?”
It is true. In such cases the phone is unnecessary. I could just run gphoto2 --shell in the terminal. However, for applications where you need more advance features, the Android phone is very versatile. In this post I describe such an advanced application that builds on top of the logic introduced here by using the phone’s camera and a Tensorflow model. This post is supposed to provide starting code and general introduction to combining the phone, camera and Raspberry Pi together. Happy hacking!